Given how easy-to-use and flexible it is, it should be no surprise that WordPress powers more than a third of the internet. It’s suitable for projects of all shapes and sizes, and if you’re thinking of starting a new online business, you are most likely considering using the world’s most popular content management system (CMS).
One of the steps you might be a bit apprehensive about is the process of installing WordPress on your hosting account. But is it really as hard as it sounds? Let’s find out.
Table of Contents:
- Is VPS Hosting Good for WordPress?
- Installing WordPress on a VPS with a Control Panel
- Installing WordPress Using Softaculous
- Installing WordPress Manually Without a Control Panel
- Conclusion
- FAQ

Is VPS Hosting Good for WordPress?
WordPress is far from the most resource-intensive CMS out there. It can happily run on most shared hosting accounts, and if you’re on a tight budget, this is probably the best place to start.
Nevertheless, a VPS hosting account will give you much better performance, security, and reliability for no more than a few extra dollars per month.
Unlike a shared server, a VPS has all its hardware resources reserved for you. You don’t need to worry about another hosting account hogging the server and compromising your website’s performance.
In addition to this, you have a dedicated IP. Only you will be using it, so you can be pretty sure that it won’t end up in the spam blacklists because someone has been sending unsolicited emails through it. What’s more, some experts claim that it can improve your search engine rankings.
Perhaps the biggest advantage to using a virtual private server, however, is its scalability. If your website gains traction with users and starts to attract more significant traffic levels, it will quickly outgrow the limits of a standard shared hosting account.
Hosts do offer shared plans with more bandwidth, disk space, and hardware power, but the setup itself limits their ability to provide adequate performance to popular projects without compromising the quality of the service for the rest of the accounts on the server.
By contrast, when you reach the limit of your virtual private server, you can simply upgrade its hardware resources and continue to grow your business. Most VPS providers situate their virtual servers on powerful cloud clusters, so they can provide you with the resources you’re after, no matter how big your requirements are.
Overall, WordPress running on a VPS can be a very solid platform for growing your business. Let’s explore the different ways of setting it up.
Installing WordPress on a VPS with a Control Panel
You need to think about quite a few things when choosing a virtual private server for your project. In addition to the hardware resources, it also pays to consider the setup and the tools you’ll use to manage your VPS.
For example, if you don’t want to do everything via the command-line interface, you need to make sure your VPS account comes with a web hosting control panel. It gives you a Graphic User Interface (GUI) that helps you manage many of the tasks associated with controlling your virtual server and the websites you host on it.
You can use it to set up individual accounts for the different projects hosted on the server, upload and manage files and databases, set up email accounts, create backups, control your domain’s DNS records, and many more.
All managed VPS servers come with a web hosting control panel as standard, and you can also set one up on a self-managed machine. There are many different control panels, all offering slightly different sets of features.
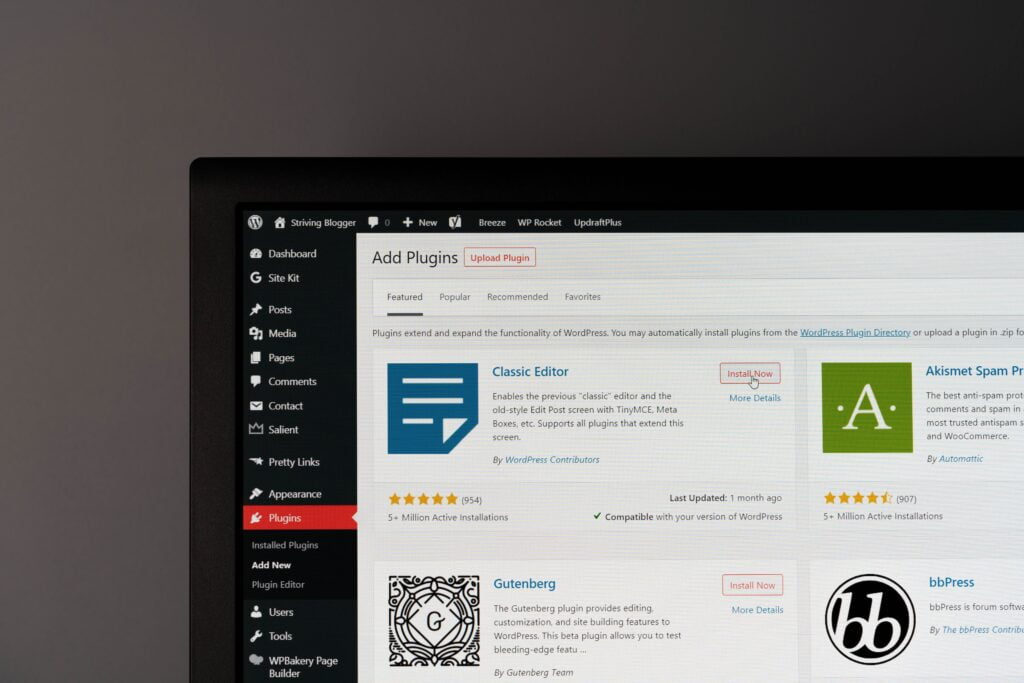
However, pretty much all of them give you an easy way of setting up WordPress in seconds. Often, it comes in the form of the Softaculous automatic installer.
Installing WordPress Using Softaculous
Softaculous is one of the world’s most popular auto-installers. With it, you can set up close to 400 different website-building applications with the click of a mouse. You don’t need to worry about configuring databases, uploading files, or extracting archives. Softaculous can do it all for you.
You need to bear in mind that all this convenience does come at a cost. Some hosting providers include the Softaculous licensing fees inside their hosting bills, while others let you use it in exchange for additional monthly charges. That being said, installing an application with Softaculous is so easy that many users consider the few extra dollars per month well worth paying.
Here, for example, is how to set up WordPress with it.
1. Access your hosting account’s control panel and look for the Softaculous icon.
Usually, Softaculous is accessible via the homepage of the control panel’s user interface. If you can’t find it, get in touch with your host’s support team.
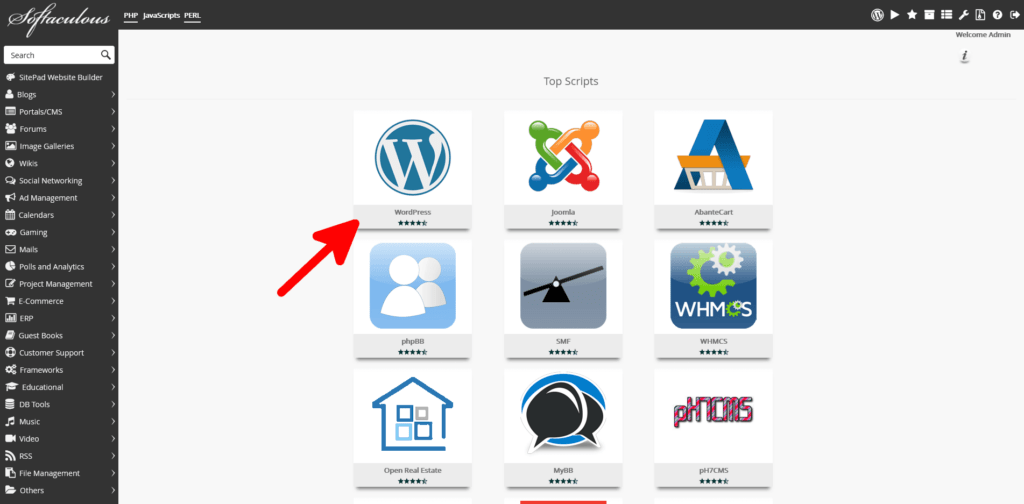
2. Select WordPress from the list of applications.
WordPress is at the very top of the list of Softaculous’s supported applications. Hover over it with your mouse and click Install.
3. Configure your WordPress installation.
The next page lets you configure quite a few things about your WordPress installation. You first get to choose which version of WordPress you want to install from the Software Setup section. You are always advised to select the latest version, as it comes with the newest features and security patches.
Next, you can choose the installation URL. The first drop-down lists the protocol options and lets you choose whether the website will load with a www. in front of the domain. This is where you also configure WordPress to redirect all visitors through secure HTTPS connections. You’ll also need an SSL certificate for this, which you can obtain at a later stage.
The domain drop-down lists all the domains hosted on your account, and if you want to install WordPress in a subdirectory (e.g., https://example.com/blog), you need to enter the folder’s name into the final field. If you leave it empty, Softaculous will install WP in the domain’s document root directory.

Through the Site Settings section, you can choose the website’s title and description and enable WordPress Multisite – a feature that lets you manage multiple websites through a single WordPress dashboard. Disabling WordPress’s default cron job is also done through this section.

Setting up your admin account is your next job. The fields ask you for the username and password you’ll use to access the WordPress dashboard as well as the admin email address.

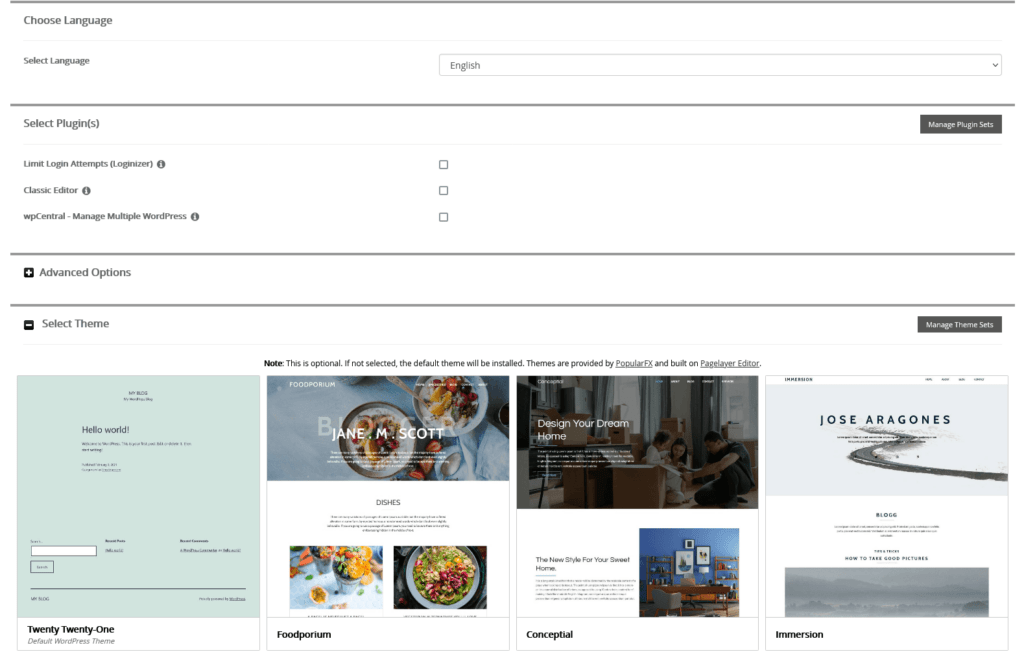
In the next couple of sections, Softaculous lets you choose a language for your WordPress dashboard, and it also allows you to set up the installation with a few plugins and themes pre-installed and activated.
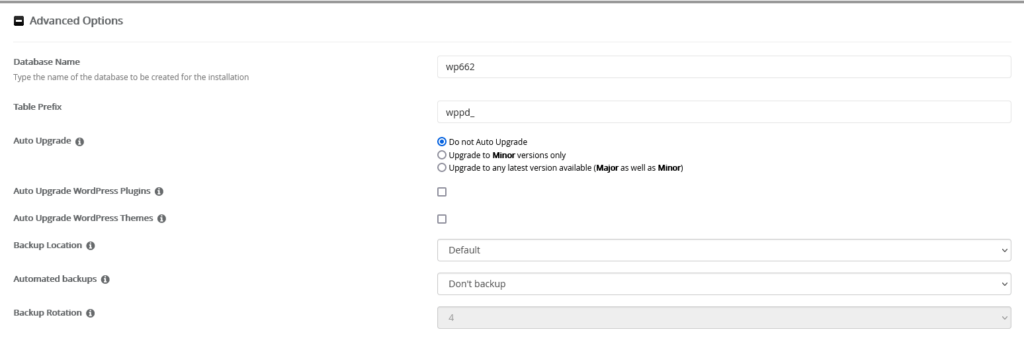
Through the Advanced Options menu, you can control settings related to the MySQL database and WordPress’s auto-update and backup systems.
Once you’re happy with all the settings, click the Install button at the bottom of the page. Softaculous will set up WordPress according to the configuration you’ve set up, and you’ll soon receive a confirmation at the admin email address you set earlier.
Install WordPress via SPanel
We’ve been in the hosting industry for well over a decade now, over the years, we’ve helped numerous WordPress projects get off the ground. When we were developing SPanel, we wanted to make it even easier for WP fans to set up and manage their websites.
The result was SWordPress – a comprehensive management tool for installing and controlling WordPress projects integrated into SPanel’s User Interface. With it, you can install WordPress with ease, clone the installation, change the admin password for the WP dashboard, manage auto-updates, and a lot more. Here’s how to get started.
1. Open SWordPress manager.
SWordPress is available on the homepage of SPanel’s User Interface. It’s accessible via the Admin Interface (by selecting the Manage button from the Actions menu next to the account) or using the account’s credentials at https://[your domain]/spanel/.
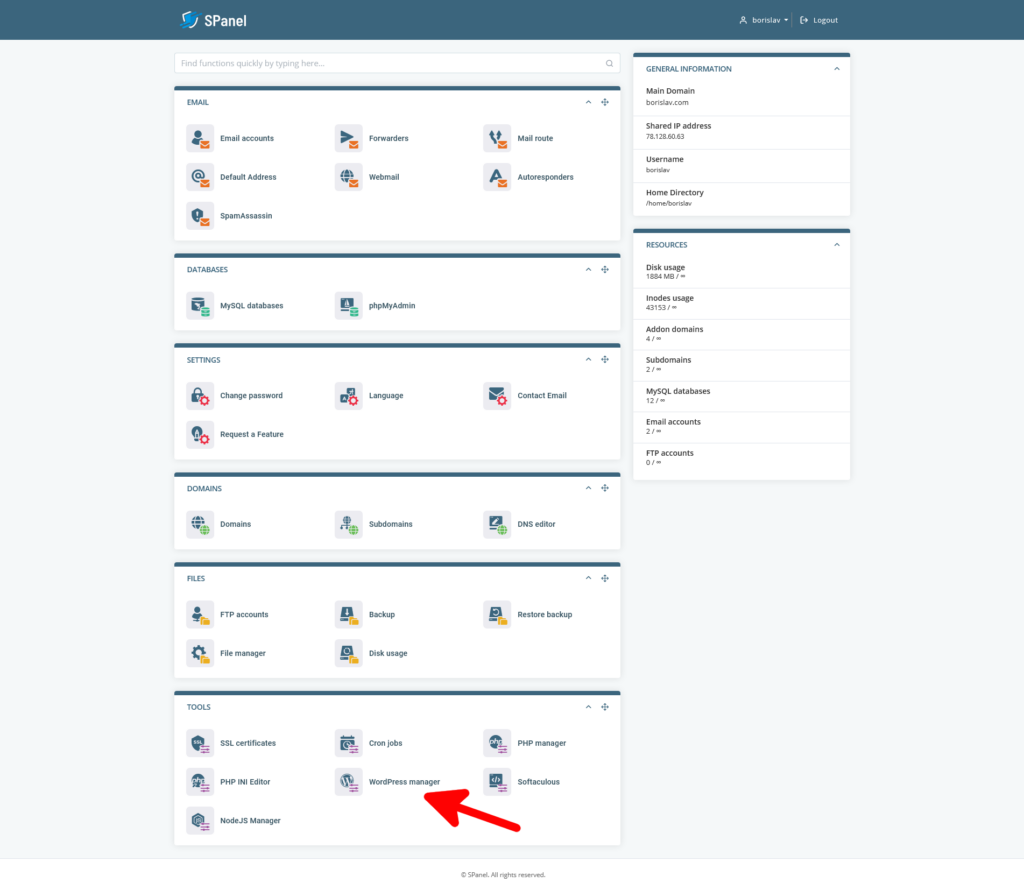
2. Install WordPress
SWordPress offers an easy-to-use interface, where you can configure everything you need with a couple of clicks. First, you get to choose the installation URL.
All the domains added to your account will be available in the first drop-down, and if you want to situate the installation in a sub-folder, you simply need to enter its name into the field. SWordPress will automatically create the directory if it doesn’t exist.

Next, you have the option of installing some plugins along with WordPress and giving yourself a competitive edge right from the start.
Here they are:
- WooCommerce – The most popular ecommerce plugin for WordPress and one of the most widely used platforms for creating online shops.
- JetPack – A plugin that gives you a comprehensive suite of tools designed to help you improve your website’s speed and security.
- All in One SEO – An SEO plugin that is used by over 2 million website owners and promises to push your website up the search engine results pages.
- WPForms – One of the most popular WordPress add-ons for creating online forms.
- MonsterInsights – A plugin that brings Google Analytics data to your WordPress dashboard.
- OptinMonster – A customer acquisition service that promises to attract more traffic and help you boost sales.

When you decide which plugins you want pre-installed on your website, you can fill in the WordPress admin’s details. In addition to the username and password, you’ll also need to enter the admin email address.
To help you boost the security of your website, we’ve integrated a password generator that enables you to protect your website with an impossible-to-guess password.
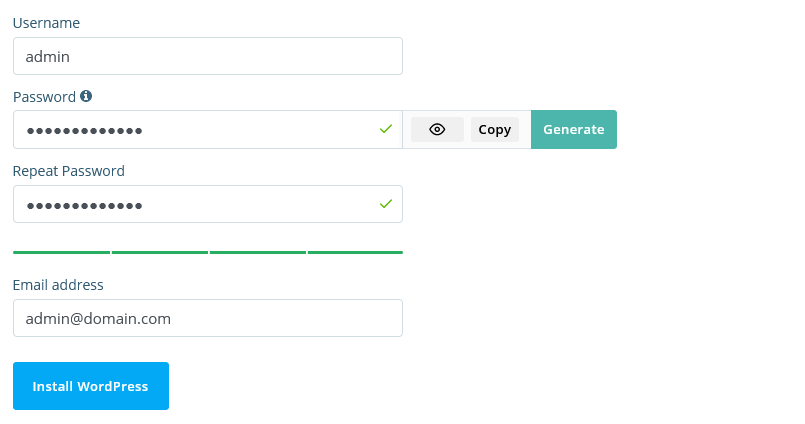
The Install WordPress button initiates the installation. After it’s complete, you’ll receive a confirmation on your admin email address.
3. Manage your WordPress installations
SWordPress lists all existing WordPress installations on the account. There are a couple of toggle switches next to each WP website:
- Security Lock – This unique security feature prevents attackers from interfering with your website’s files. By default, it’s turned off because if it’s enabled, you can’t install new themes and plugins. If you want to keep your website as secure as possible, it’s best to turn it on after setting up WP’s appearance and functionality.
- Auto Update – If this toggle switch is enabled, updates to the WordPress core and the themes and plugins will be installed automatically. Whenever an update is available, the auto-update function will temporarily disable the Security Lock feature to apply them, after which it will turn it back on.
In addition to the two toggle switches, you can use the Actions drop-down menu to change the admin’s passwords, clone the installation for testing purposes, or uninstall the selected WordPress website.

Installing WordPress Manually Without a Control Panel
With an automatic installer and/or a control panel, you can set up WordPress in seconds. However, many VPS plans, particularly the self-managed ones, don’t offer a control panel by default.
How do you go about starting your WP-based project if that’s the case?
There are two options.
Install WordPress via FTP
The first method involves manually uploading WordPress’s files to the virtual server and completing the installation yourself. Here are the steps:
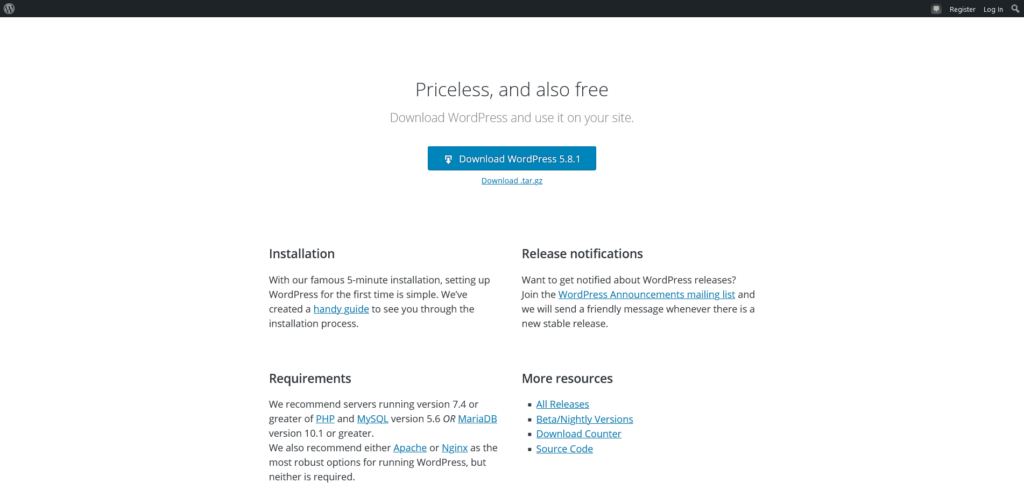
1. Download WordPress from https://wordpress.org.
As you probably know, WordPress is open-source and free to use. You can download it from here as a ZIP or TAR.GZ archive.
2. Extract the WordPress Files and Upload Them to the Server.
You’ll first need to extract the WordPress files from the archive. Then, you’ll have to connect to your virtual server via FTP. There are many FTP clients, but the go-to solution for many is FileZilla.
One of its main advantages over some of its competitors is that it allows you to drag and drop files directly to the installation folder on the remote server.
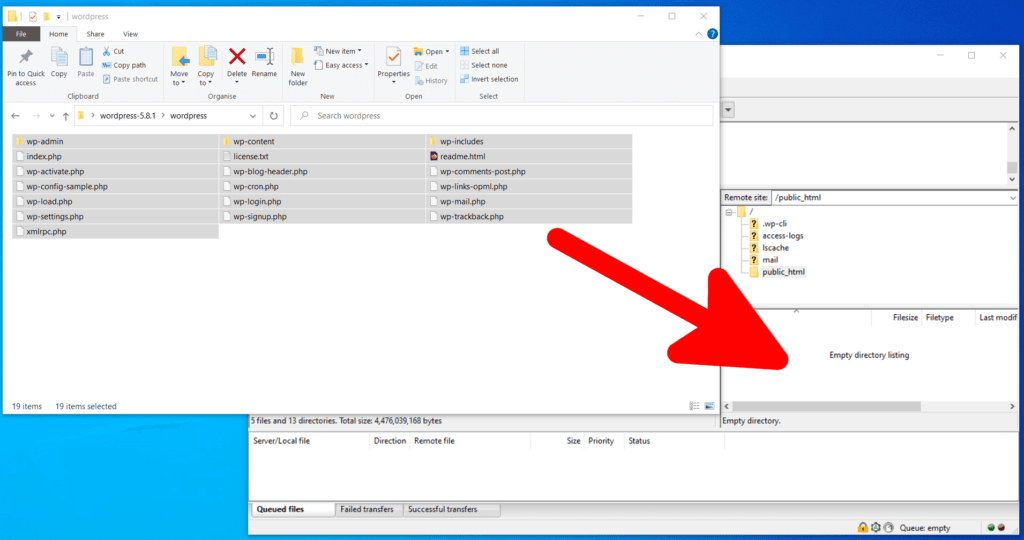
NOTE: Double-check to ensure you’ve selected the correct installation folder. If you want to set up your WP project on your primary domain, you need to install it in the document root directory (i.e., the public_html folder).
3. Create a Database and a User
Before you can continue with the installation, you’ll need to create a database and set up a user so that WordPress can access it. How you’re going to approach this depends on your virtual server’s setup.
For example, even if you don’t have a web hosting control panel, the VPS may have a GUI-based database management application like phpMyAdmin.
Alternatively, you can SSH into the server and use the command-line interface to create the user and the database yourself. First, you need to log into MySQL with the root user password to set up the new user and give it the privileges to create a database.
Then, you need to log out and log back in with the user you’ve just created. The command for setting up a new database is CREATE DATABASE. More information on how to manage MySQL databases via the command line is available in MySQL’s documentation.
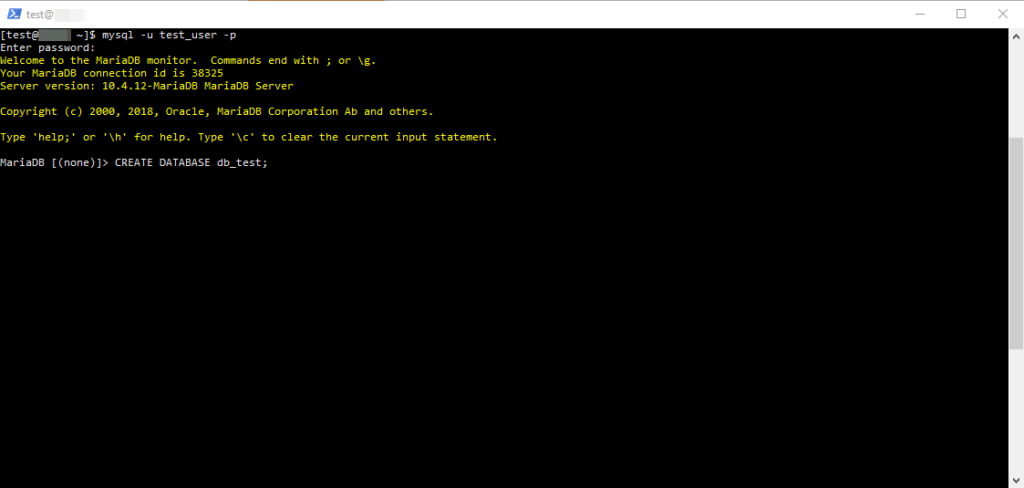
NOTE: Make sure you save the name of the database, the user, and its password, as you’ll need them in a minute.
4. Run the Installation Wizard.
The final stage of the installation process involves running the WordPress installation wizard and starting work on your website. Open a browser window and navigate to the location where you situated the WordPress installation. If you haven’t yet pointed your domain to the virtual server, you might want to use your computer’s hosts file to ensure you see the installation.
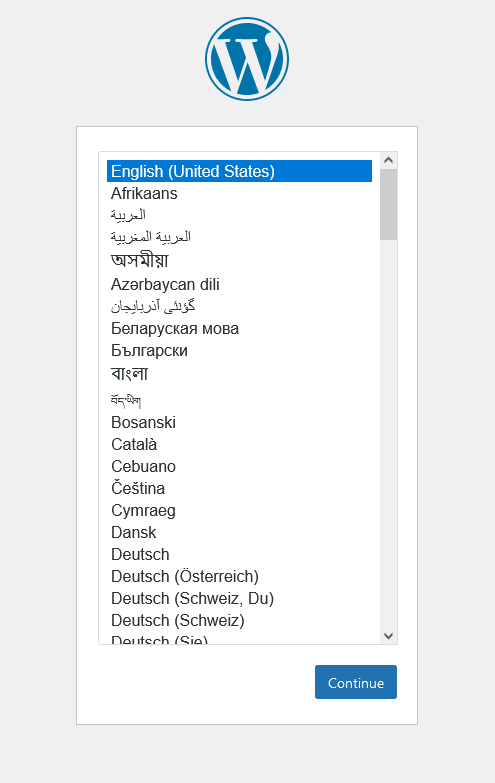
First, you’ll be asked to select the language for the interface.
The next page notifies you that you’re about to configure WordPress to work with the database you created during the previous step. It also tells you that if something goes wrong, you can fix the issue by editing the wp-config-sample.php file situated in the installation folder.
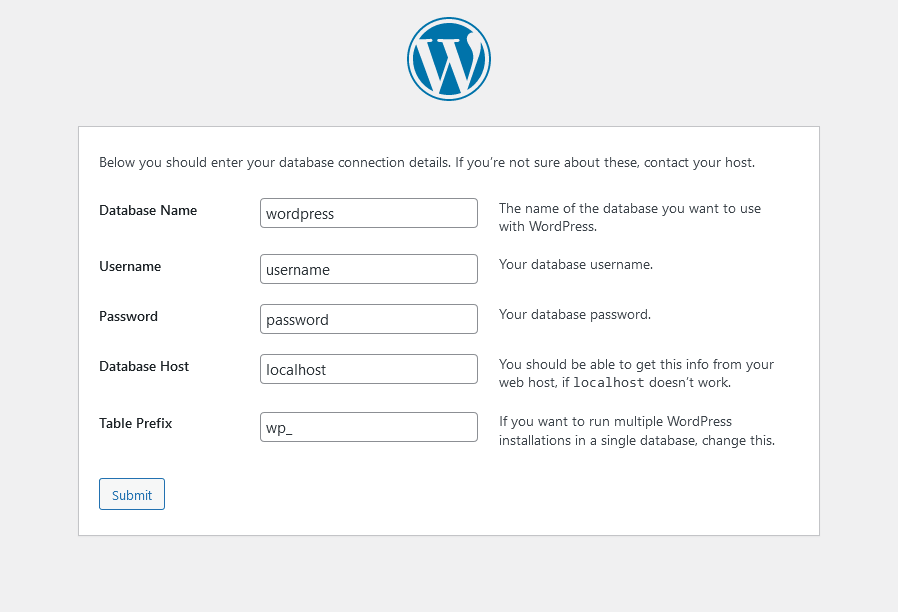
The Let’s go button leads you to the step where you need to enter the database details. You have a total of five fields, though, for a standard installation, you only need to enter the Database name, the Username, and the Password.
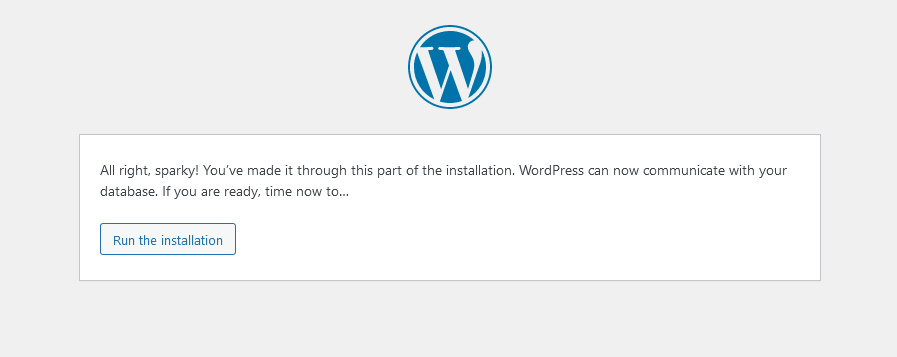
With WordPress successfully communicating with your database, you can move on to the next step.
It’s time to configure your new WordPress website. You first need to enter the site title, as well as the username and password you’ll use to access the WordPress dashboard. This is where you set up the admin email address, as well. Double-check it before you proceed because if you don’t have access to the admin email, you may struggle to complete some of the essential tasks associated with managing your website.
The final checkbox discourages search engines from crawling your website and indexing it. It may be a good idea to enable it if you’re still developing your website and you’re not yet ready to show it to the world.
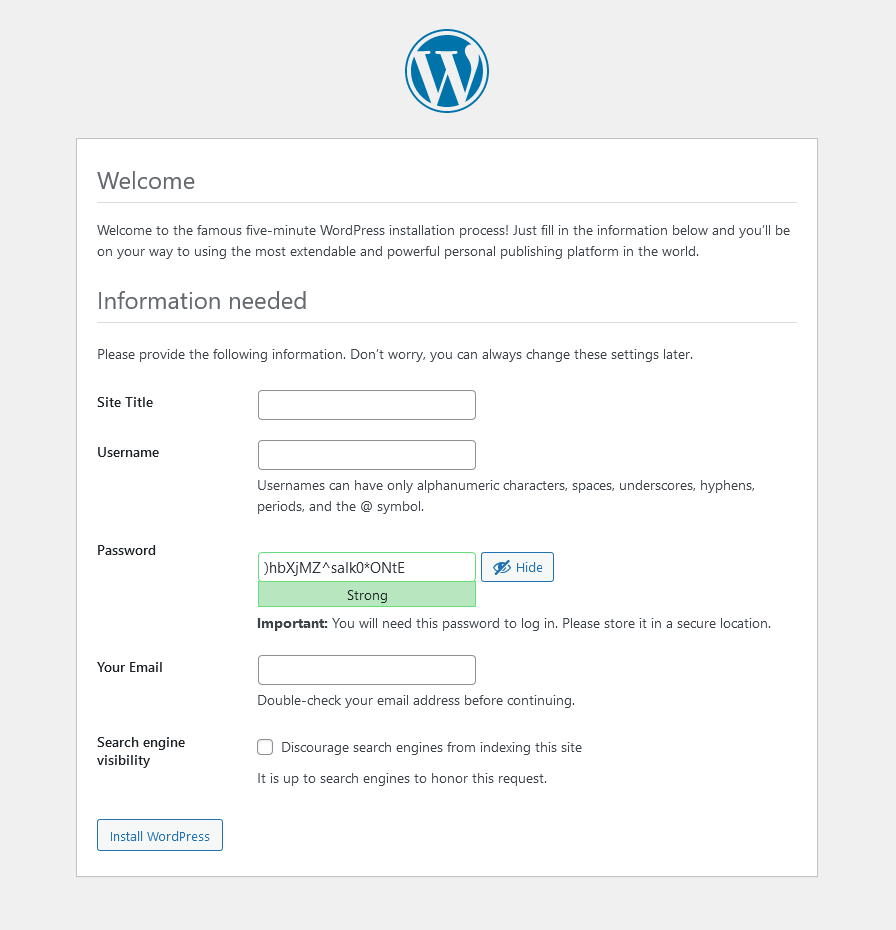
When you’re happy with the configuration, click Install WordPress to initiate the installation, and in a few moments, you will be able to log into your WP dashboard and start work on your website.
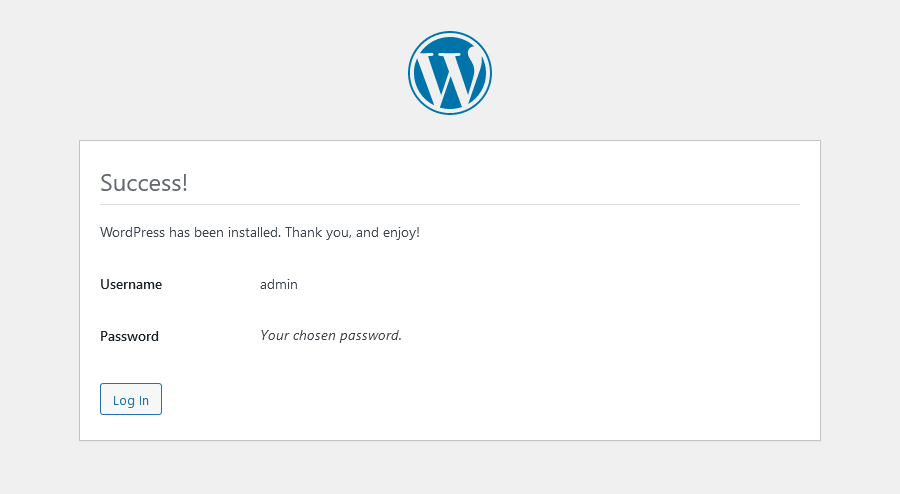
As you can see, there’s nothing too complicated about installing WordPress via FTP. However, it involves quite a few steps, and you will need to set aside a more significant chunk of time if you decide to go down this route.
If you’re comfortable working with the Terminal, you can use a method for installing WordPress that will get you going a lot quicker. It’s available thanks to a tool called WP-CLI.
Installing WordPress using WP-CLI
WP-CLI is a command-line interface for WordPress. With it, you can install and uninstall themes and plugins, change passwords and core settings, and even publish pages and posts. You do all this via the Terminal.
It’s also possible to install WordPress using WP-CLI, and it may just be the method of choice for people who are used to the command-line interface. The only thing you need to do before you start is to create a database and a user either via the Terminal or through the database management application provided by your host.
You’ll also need to make sure WP-CLI is installed. Because it’s such a popular tool, WP-CLI is available on many virtual servers, especially if you choose a managed plan. However, on a self-managed VPS, you may need to install it yourself. Thankfully, WP-CLI’s website explains in great detail exactly what you need to do.
With the database set up, you can use the following command to remotely download WordPress’s files to your virtual server.
wp core download
NOTE: Make sure you first navigate to the installation directory. If you want to use WordPress for your primary website, you need to install it in the document root folder (usually called public_html).
Next, you need to connect WordPress to the database.
The command is as follows:
wp core config –dbhost=[the database host (usually, you need to enter localhost)] –dbname=[the database’s name] –dbuser=[the database’s user] –dbpass=[the database’s password]
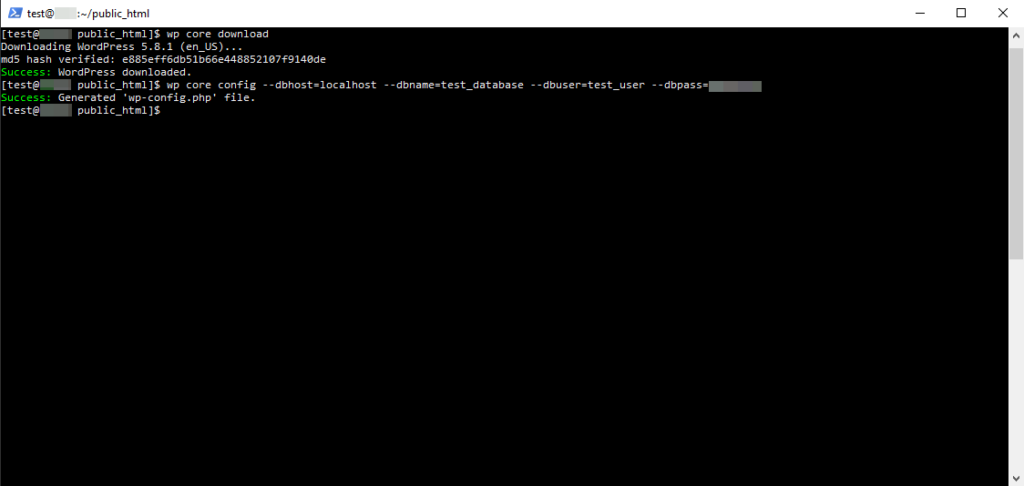
After you hit Enter, WP-CLI will generate a new wp-config.php file and automatically enter the relevant information. It’s time to configure your website and the admin account you’ll use to access the WordPress dashboard.
Here’s the command:
wp core install –url=[your domain name] –title=”[your site’s title]“ –admin_name=[the username for your admin account] admin_password=[your admin password] –admin_email=[the admin email address]
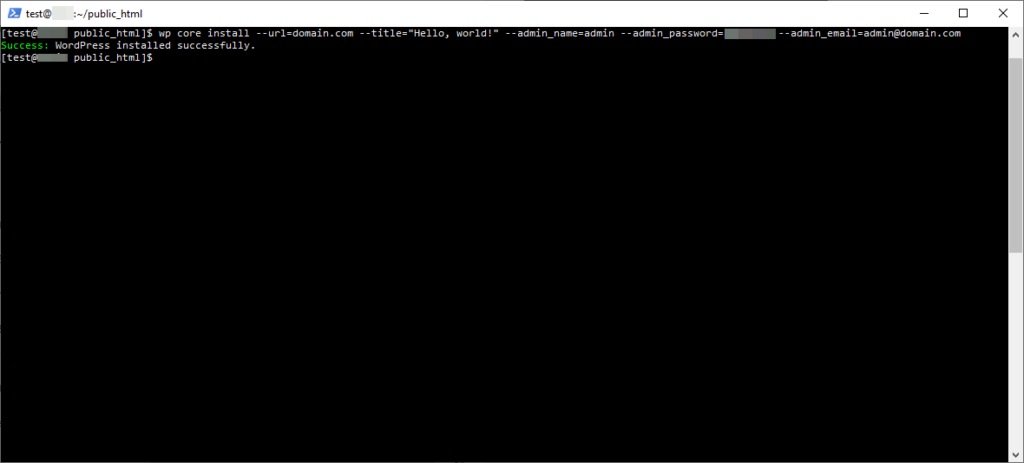
In a few seconds, WP-CLI will inform you of the successful installation, and you will be able to log into your WordPress dashboard and start work on your website.
Conclusion
One of the things that make WordPress so popular is its ease of use. The dashboard is notoriously user-friendly, and the incredible pool of add-ons and themes means you can create something truly unique without having any coding or web development skills.
Before you can get to this, however, you need to install the CMS – a process that, on the face of it, at least, is a lot more complicated. Thankfully, the tools and systems helping you set up and configure WordPress have evolved a lot over the years and have reached a point where they are accessible and usable by even the most inexperienced website administrators.
FAQ
Is VPS good for WordPress?
Although it will work happily on a less powerful shared account, hosting your brand new WordPress website on a virtual server gives you better performance and the ability to grow your business more efficiently. The infinite scalability means VPS hosting is suitable for websites of all shapes and sizes and will support your project even when the traffic levels increase.
Is it difficult to install WordPress on a virtual server?
You will most likely be supplied with a web hosting control panel and an automatic installer that can set up WordPress on your VPS in seconds. Even if you aren’t, there are multiple methods for manually installing the world’s most popular content management system. They do involve a few more steps, but if you take your time, you can complete the process even if you have never done it before.
Can I install WordPress manually without a control panel?
Yes, you can. You can either upload the WordPress files to the server, set up the admin account, and configure the installation to work with your database, or you can use WP-CLI to set up and manage your WordPress website via the command-line interface.


