Email signatures are necessary for your business emails. Like your business email address, they show information about you and your business.
Depending on how you configure it, email signatures can contain details such as business logo, your name, position in the company, electronic business card, or an image of a handwritten signature.
To use it efficiently, you must first set it up and affix it automatically to outgoing messages or manually add it to messages as the case may be.
Let’s get you started.
How to Create and Add Your Email Signature in Outlook
You can create your unique email signature and choose what messages it goes with. Here are the steps to follow.
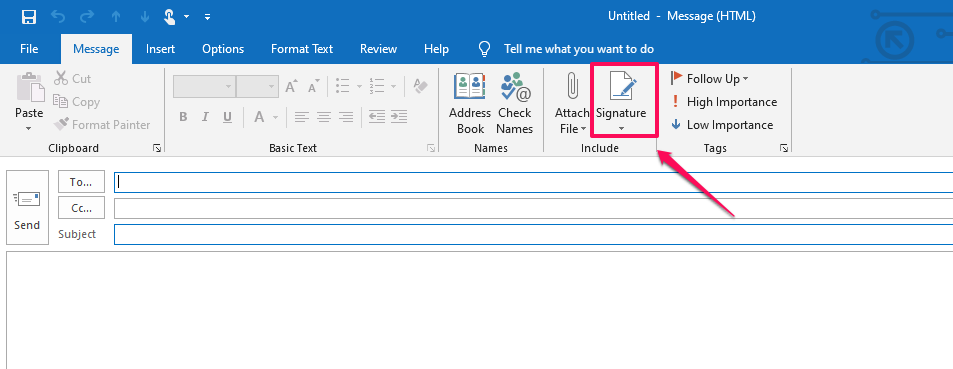
1) Open the Outlook app on Windows and click on New Email.

2) Under the Message drop-down box to the right, select Signature > Signatures.
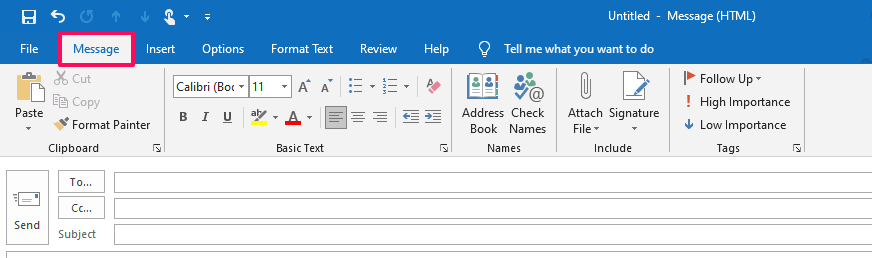
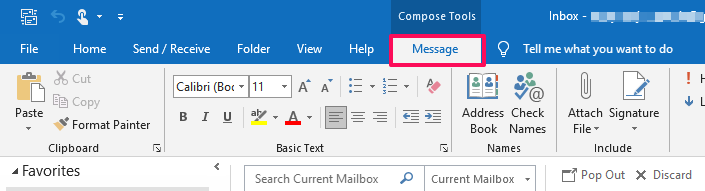
The Signature button and Message menu can be in two different places depending on your Outlook window size. It also depends on whether you’re composing a new email, replying, or forwarding a message.
Location A: New Email
Location B: Reply or Forward Email
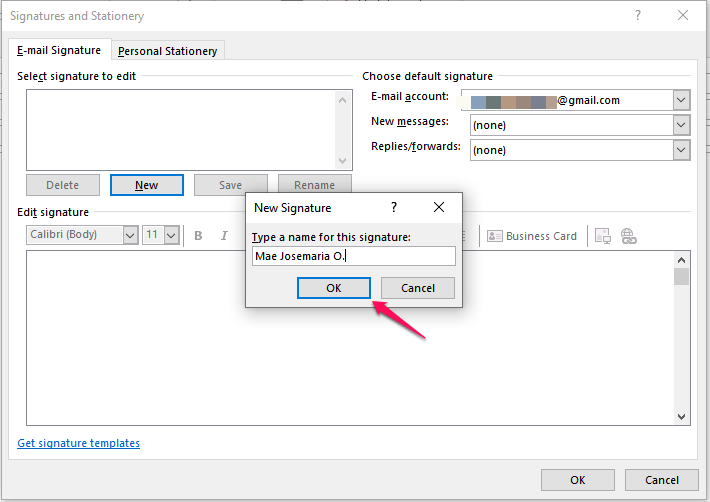
3) You’ll see a Signatures and Stationery pop-up box – select New.
4) Type in a name for the signature in the New Signature dialog box, and click Ok.
5) Under Edit Signature, create your signature. Be creative – change font sizes, font types, and font colors. You can format your signature text using Word and create a full signature with tables, borders, or bullets.
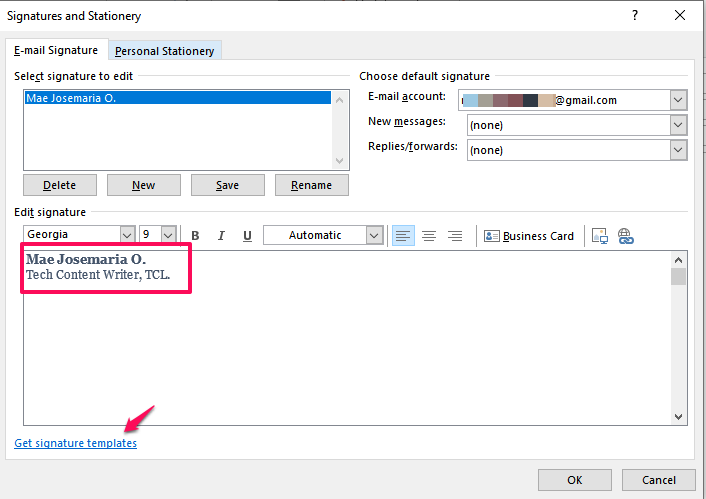
Also, make use of downloadable signature templates you can customize in Word. Edit, copy and paste the finished work in the Edit Signature box.
When done, Click OK.
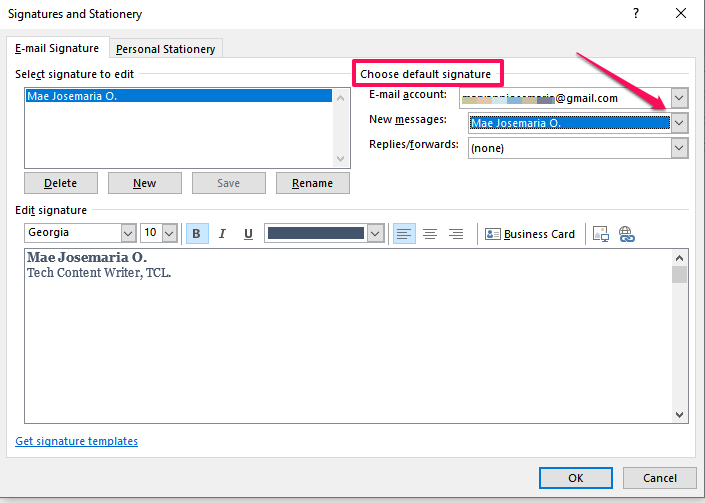
6) If you’re creating your first signature, click the Signature box again, and choose the signature name you just created. If you aren’t, jump to the next step.
7) Under Choose default signature, set the following options:
- Go to the E-mail account drop-down box, and choose one of your existing email accounts for the signature. You’re free to have different email signatures for each email account.
- Click the New messages drop-down box, and select any of your existing signatures to add them to all new messages by default. Choose none if you want to add signatures instead, manually. This option doesn’t affix signatures to messages you reply to or forward.
- Click the Replies/forwards drop-down box and select an existing signature to automatically affix your signature to messages you reply to and forward.
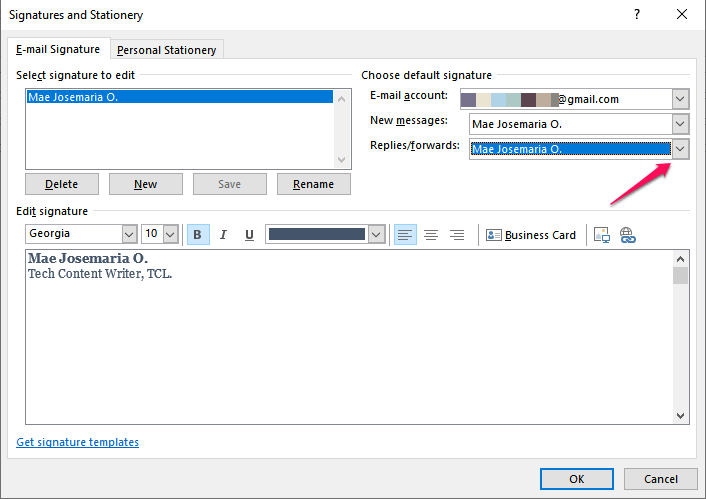
The above options allow you to customize and set your email signature for sending new messages, replies, and forwards.
How to Add a Logo or Image to Your Email Signature
Use the following steps to add your business or brand logo to your email signature.
1) Open the Outlook app on Windows and click on New Email.
2) Under the Message drop-down box to the right, select Signature > Signatures.
3) Under the Select signature to edit box, choose the preferred signature to add an image or logo.
4 ) Click on this icon ![]() to locate the image file in your Pictures folder. When you find it, click Insert.
to locate the image file in your Pictures folder. When you find it, click Insert.
5) Right-click the image, and choose Picture to resize it. Use the options under the Size tab to resize your image. Be sure to keep the Lock aspect ratio box checked to retain image proportions.
Select OK when done, and select OK again to save the changes you’ve made.
How to Insert Your Email Signature Manually
Have different signatures and don’t want them to appear automatically on every new message, replies or forwards? You can insert them manually instead. Use these steps below.
1) Open the Outlook app on Windows and click on New Email.
2) Under the Message drop-down box to the right, select Signature.
3) Select the preferred email signature from the fly-out menu that appears.
You can also manually edit the selected email signature on the message box.
Wrap Up
Email signatures are perfect for giving out subtle and handy information about you and your business. It leaves a great impression by giving off an air of professionalism.
Get the most of your business email today with Scala Hosting. We can walk you through setting up a business email in your Virtual Private Server (VPS) and attaching an email client to your business address.
