Shipping settings in WooCommerce revolve around geographical locations. Such can be countries, states, regions, and ZIP codes.
Every shipping zone consists of the following:
- a list of geographical locations
- second list of shipping methods
Once a customer is matched within the list of locations, they can see the shipping methods list.
The shipping methods integrated into WooCommerce by default are:
- Flat rate
- Free shipping
- Local pickup
You can have additional, more complex shipping methods, thanks to Woo plugins. Many service providers offer their own WooCommerce plugins (such as USPS or DHL) or tools (such as Table Rate Shipping). Table Rate Shipping is useful when you want to define a custom rule set for calculating shipping fees.
WooCommerce also has a default shipping zone labeled Locations not covered by your other zones. This shipping zone automatically applies to all geographical areas that don’t have a custom shipping zone assigned to them.
Example: You set up free shipping for major cities in your country, the Locations not covered zone can be used to specify flat rate shipping for all other towns and rural areas.
Creating a Shipping Zone
To begin creating a shipping zone:
1. Head over to WooCommerce → Settings
2. Click on the Shipping tab

3. Click on the Add Shipping Zone button next to the title of the page

4. Fill out Zone Name. For example: Free Shipping
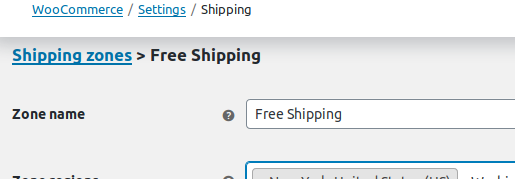
5. Fill out the Zone Regions field just as you would normally add tags to a post. Note that the field offers auto-complete suggestions.

6. Optionally, you might want to limit your shipping methods to specific ZIP codes. Click on Limit to specific ZIP/codes located under the Zone Regions field.
Adding a Shipping Method to a Shipping Zone
7. To associate a shipping method, click on the Add Shipping Method button near the bottom of the page.
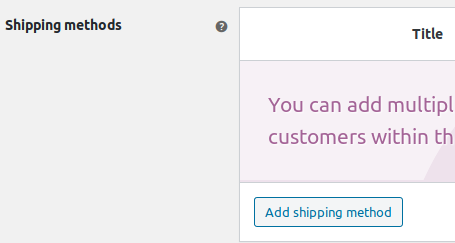
8. This will launch a pop-up that prevents you from losing your settings.
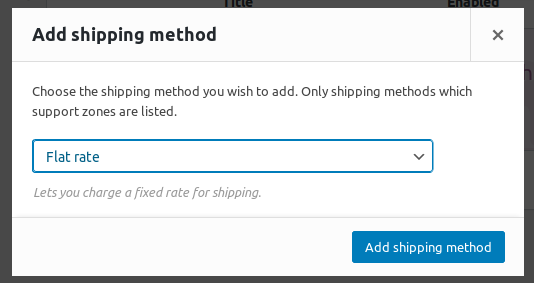
9. Pick a shipping method from the drop-down menu and confirm your choice with Add Shipping Method. This will return you to the previous screen.

Note: Adding a shipping method to the shipping zone will save changes for you. No need to click the Save Changes button at this point.
Rearranging Shipping Methods
The Shipping Methods table is intended to reflect the order in which shipping methods are displayed to customers on the checkout page. This includes their Title as well.
Use the drag handle at the beginning of every row to move the corresponding shipping method up and down the table.

Tip: Move the most convenient method for your business at the top of the list.
Shipping Classes
Shipping classes are used to combine products into groups that have specific shipping rates assigned to them. To illustrate that, let’s assume the following scenario:
There are two types of products in your online shop:
- Organic Products, such as chilled meats.
- Accessories, such as cutlery and boxes.
You have created a Shipping Zone with your area’s ZIP code and assigned a flat rate shipping method set at $10 per delivery. Shipping refrigerated foods requires special containers worth $2 each. This increases delivery to $12.
To solve this, you can create a shipping class, group together only with refrigerated products, assigning a rate of $12 for the shipping class.
Let’s see how this is done in more detail.
Creating a Shipping Class
1. In the Shipping Settings tab, click on the Shipping Classes section.

2. The table is identical to the one we used previously. Click on the Add Shipping Class button to create a new row.
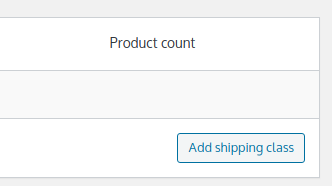
3. A new blank row is created, awaiting your input.

4. Fill out the Shipping Class Name field to set a name for your reference. For our example, this will be Refrigerated Foods.
5. You can leave the Slug field empty. It’s automatically generated based on the shipping class name.
6. Optionally, fill out the Description field with a note to yourself. You will need it if you have several similar shipping classes or use abbreviations for class names.
7. You can use the Add Shipping Class button to add multiple classes. Just make sure to click Save Shipping Classes once you are done editing.
Assigning a Shipping Class Rate
8. Return back to the Shipping Zones section.

9. For this example, we’ll edit a shipping zone with flat rate shipping applied to it. Move the mouse over the row of the shipping zone and click the Edit link that appears.

10. In a similar fashion, move the mouse over Flat Rate and click Edit.

11. A pop-up appears, and this time it includes a section titled Shipping Class Costs.
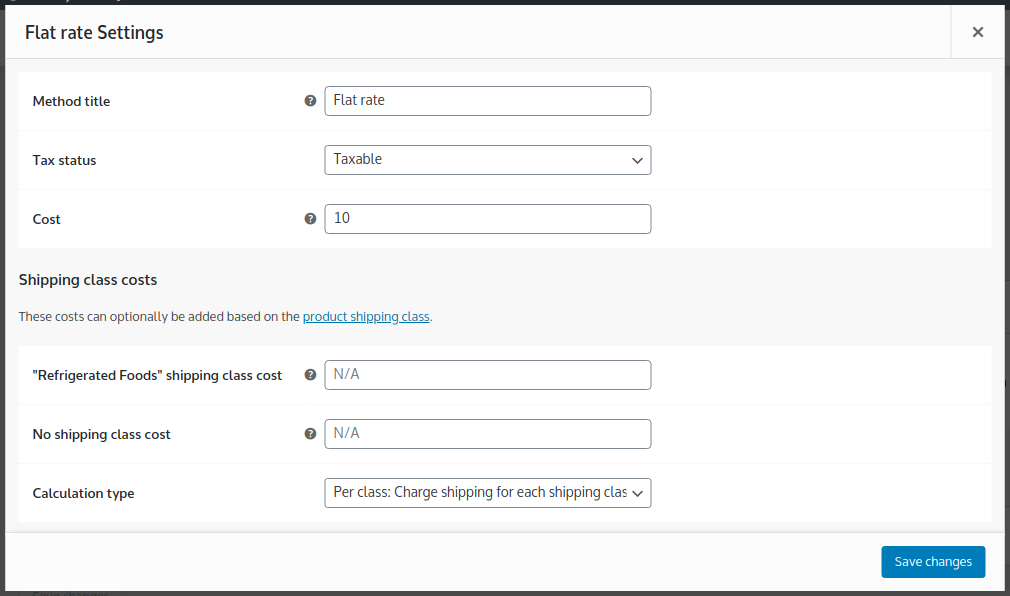
12. In the field labeled Refrigerated Foods shipping class cost enter the added price.
Note: The base cost for this shipping method (which is $10) will be applied to the shipping class, to a total of $12.
Using No Shipping Class Cost and Calculation Type

When multiple products in the shopping cart have different shipping classes, you can pick from two options for calculating the total cost of shipping:
1. Per Class: Charge shipping for each shipping class individually
– Creates a shipping price based on the sum of every shipping class present in the cart. If you pick this option, make sure to use the No Shipping Class Cost field to specify the default cost for products that don’t have a shipping class.
2. Per Order: Charge shipping for the most expensive shipping class
– Applies the price of the most expensive shipping class to the entire order.

Assigning a Shipping Class to a Single Product
Reminder: Shipping does not apply to virtual products, downloadable products, and affiliate/external products.
To assign a shipping class, you’ll need a product where shipping is active. For our example, we’ll use one of the sample products which is a simple product.
1. Head over to the Products screen.
2. Move the mouse pointer over Beanie with Logo and click Edit.

3. Scroll down to reach the Product Data box.

4. Switch to the Shipping tab and use the Shipping Class drop-down to select Refrigerated Foods or whatever name you’ve chosen for the shipping class.
5. Make sure to save your changes with the blue Update button located in the Publish box.
Assigning a Shipping Class With Bulk Editing
1. Back in the Products screen, locate the checkboxes at the beginning of every row.
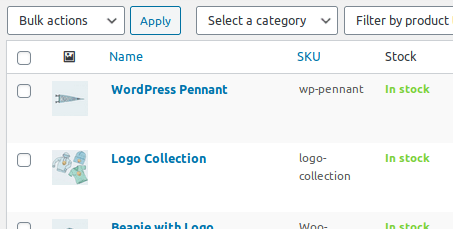
2. Clicking the checkbox on the very first row of the products list selects all products. Clicking the checkbox on every other row selects only the product for this row. Use either of these to make a selection.
3. Click on the Bulk Actions menu, located on the top right of the Products table.
4. Click Edit and then Apply.
5. This expands a new section, displaying the majority of your product attributes.
6. Once it opens, locate the Shipping Class drop-down in the Product Data section.

7. Use it to select the tax class created earlier. In our example: Refrigerated Foods.
8. Make sure to save settings by clicking the Update button, located just below the product attributes.
