The WooCommerce Profiler
Welcome to WooCommerce!
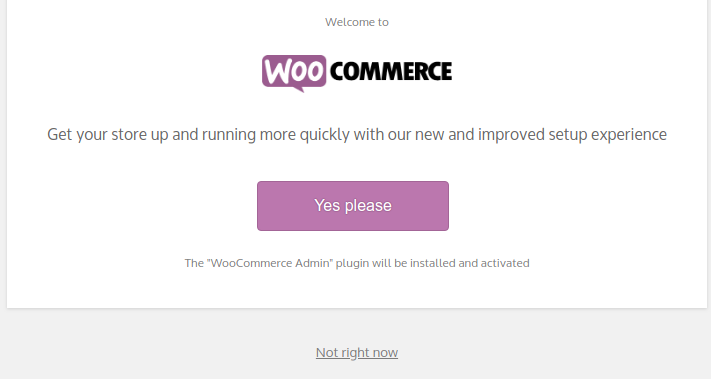
On this page, you will see a couple of options:
- “Yes please” – starts the WooCommerce Profiler (description below)

- “Not right now” – returns back to the WP admin screen. You can skip to the next section of this guide: WooCommerce Settings

Click the Yes Please button to continue.
The page you’re looking at is what is known as the WooCommerce Profiler. It’s basically a setup wizard. The WooCommerce Profiler walks you through a few questions that Woo utilizes to suggest additional suitable plugins.
The Profiler also lets you take part in the evergrowing WooCommerce community by providing valuable feedback on how you intend to use your store. It’s important to participate whenever possible because this data helps developers create new add-ons and improve the platform capabilities as a whole.
It’s just a great way of saying “Thank You!”
On to the WooCommerce Profiler:
#1 Store Details
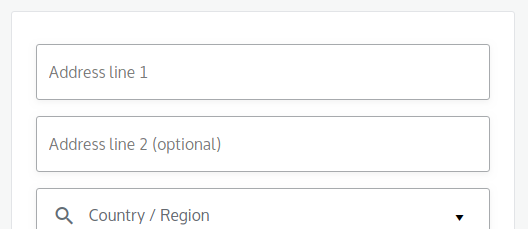
This section covers the most basic details of your business. The information you submit here is used to set up currency, shipping location, and so on. None of it is publicly visible, and you can change it at any time from the WooCommerce Settings (covered in the next section).

There is no explanation as to what this checkbox does, aside from the speculations that it’s used for statistical purposes. Which is most likely so.
You’ll see more data collection going on in the next steps. Please remember that sharing data with the WooCommerce Team is what makes the plugin as useful as it is.

Click the Continue button to move to the next step.
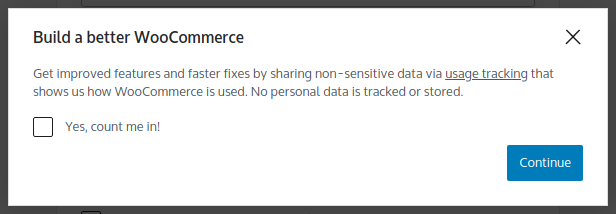
This is the first opportunity to start sharing statistical data with WooCommerce. If you are concerned about the collected data and how it is being used, check out the WooCommerce Usage Tracking page.
Decide whether you’d like to opt-in for sharing statistics and press Continue afterward.
#2 Industry

The Industry section allows you to identify where your store falls in the market. The selectable options here represent the most common niches, but if they don’t apply to your case — simply select the Other checkbox at the bottom and manually enter your industry.
This data is also used for statistical purposes.
#3 Product Types
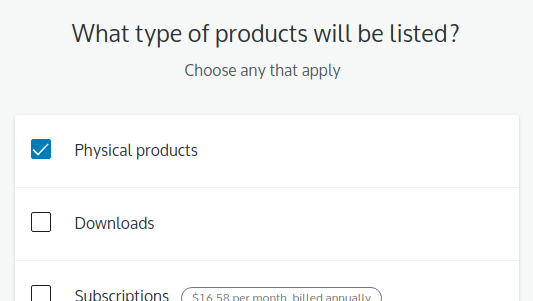
On this page, you get to configure the types of products you plan to sell within your shop.
Physical Products and Downloads are the two main product types for WooCommerce. This means you can get started selling these without having additional plugins installed.
As their name suggests, the former category applies to any physical products, while the latter covers downloadable goods. It’s always a good idea to check out the other options as they might give you some ideas about possible alternatives.
None of these checkboxes are mandatory — they’re just a convenient way to have your plugins configured right from the start. Note that next to each option, there is a pink Learn More option you can use to familiarize yourself with the pricing and features of the plugin. All links open in a new window.
#4 Business Details
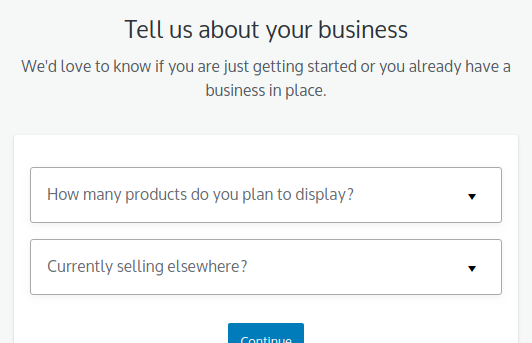
On the Business Details page, you will see two drop-downs, both required. The details you enter here will be used to further fine-tune WooCommerce to your needs.
How many products do you plan to display? will set the number of products you display per page. The default for WordPress is 10 per page, which is not sufficient for many online shop owners.
Currently selling elsewhere? aims to add more marketing channels than the included defaults. It helps you popularize your store across multiple platforms.
Depending on your answers here, WooCommerce sets you up with three different plugins. All are free to install, but they might require some investments later on (like an ad budget):
- Syncs your WooCommerce products with the Shop section of your Facebook page.
- Installs a tracking pixel that gathers visitor data you can target with Facebook ads.
- Integrates Facebook Messenger with your site.
- Sets up several automations such as reminders for customers who abandon their cart mid-purchase.
- Collects subscriptions with a pop-up, building you an email list.
- Can add WooCommerce discount codes into your outgoing emails.
- A high-rated plugin that syncs your products with Google Shopping.
- Provides access to free product listings on Google and Google Shopping.
- Runs paid shopping campaigns across several Google-owned advertising channels.
Click Continue and allow a moment for WooCommerce to automatically install and activate the plugins you’ve picked.
#5 Themes

The last step of the WooCommerce Profiler presents you with a number of paid and free ecommerce-ready themes.

Have a look at your available designs and Preview the themes you like best.
Alternatively, you can continue with your current theme. Look for the blue button located on the first template on the list.
#6 Jetpack and WooCommerce Services
A bit of a surprise and like a secret bonus page, after confirming your theme choice, you will be presented with the following:

Before we jump into the overview, note that you can have both plugins installed as easy as clicking the Yes Please! button. Once you’re done with this step, you will be redirected to the WooCommerce Home page.
Jetpack for WordPress is a plugin that bundles a number of tools for site security, analytics, and website management. More importantly, it offers performance improvements by moving over images and JavaScript files from your WordPress site to the WP server network. This takes off some load from your web hosting account and improves page load speeds.
Jetpack for WooCommerceis the popular WordPress plugin but with an ecommerce twist. It features store statistics, and if you are shipping from the US or Canada, you can get discounts by setting up USPS as your shipping provider. This will instantly integrate with your store and enable you to print shipping labels as well.
Jetpack is free and packs a ton more features that are outside the scope of this guide. It’s up to you to try it out and see for yourself. With more than 5 million installs and a 4/5 star rating in the WordPress plugin repository, it’s definitely a safe bet.
WooCommerce Services combines a lot of great ideas and features under one roof. The solution takes a huge burden off your shoulders through automated tax calculations, shipping, and payment processing.
With WooCommerce Services, you can apply delivery rates on your shipping as per Woo’s shipping volume. This is great since we’re talking about discounts of up to 90%.
This plugin can provide a mixed experience because there are a lot of features packed under one roof. If you don’t need most of them (say, you’re not in the States), this plugin can become unnecessarily overwhelming.
Furthermore, WooCommerce Services comes bundled with Jetpack, bringing a ton of new functionalities to the table. The downside to having the two plugins run side-by-side is the increased resource consumption, which could easily slow your store down.
As always, when it comes to plugins, being frugal is mostly a good idea.
General WooCommerce Settings
When you are done with the WooCommerce Profiler, you still need to have a look under the hood to ensure customers get the best experience.
Going through the WooCommerce Settings pages is the actual configuration process you need to complete for your ecommerce store.
Developing an online shop with WooCommerce might seem like pilling themes and plugins together, but it’s actually the additional settings that make the difference.
Enabling HTTPS on Your Store
1. In the main menu of the WP admin, click Settings → General
2. Locate the following fields:

3. In the example above, the fields start with HTTP instead of HTTPS. This is the default for all website addresses, so we need to have it set to HTTPS from here.
Edit the text in both fields to begin with HTTPS instead of HTTP.
4. Confirm the settings by clicking Save Changes.

5. You are now logged out and redirected to your store’s HTTPS address. To continue, log back in.
Setting WooCommerce as the Front Page
1. Click Settings → Reading
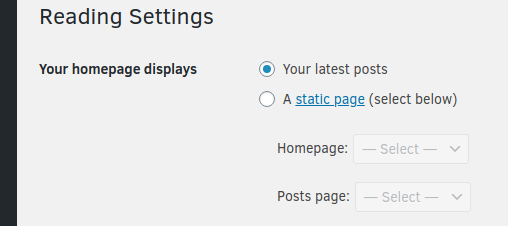
2. Switch Your Homepage Displays over to A static page
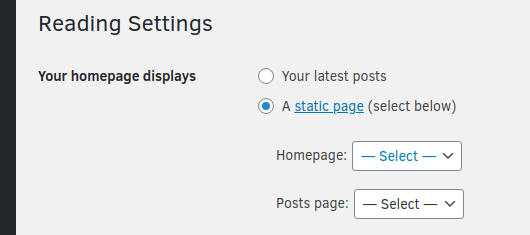
3. Set the Homepage drop-down to Shop
4. If you want to have a page displaying your latest posts, make sure to Save Changes, create a new static page, ex: Blog or News, and then select it from the Posts page drop-down.
General Settings
Store Address
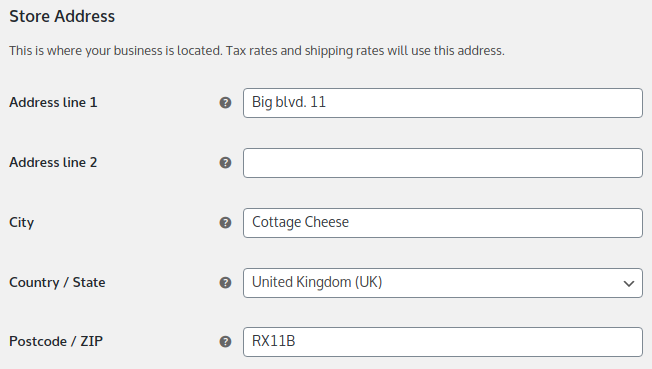
In case you skipped using the Profiler, fill out those fields – the data here is important for your store’s mechanics, such as calculating taxes and delivery fees.
General Options
The settings here are useful if you would like to limit people from certain geographic areas to place orders from impossible-to-deliver locations.

Selling Locations can be set to:
- Sell to all countries (default)
- Exclude countries to sell to
- Sell to specific countries.
If you have selected any of the latter two options, make sure to fill out the field that appears below this drop-down menu. Enter countries inside as you would enter tags for a post.
Selling locations affects the Billing Address section of the checkout page, where customers can select the location associated with their payment method.
Example: if you don’t accept payments from France, for some reason.
1. Click the Selling Locations drop-down.
2. Select Sell to all countries, except for…
3. A text field will appear below the drop-down.

4. Enter the first few letters of a country’s name. Suggestion(s) for the full name will appear.

5. Make sure to confirm any changes you made with the blue Save Changes button at the bottom of the page.

You can specify Shipping Locations the same we did with Selling Locations. This option handles the Shipping Address area on the checkout page. If you cannot deliver to certain locations, create a filter by using this drop-down.

Default Customer Location is used to “guess” where your customers are visiting from so that relevant taxes, languages, and currencies can be displayed. WooCommerce can either do that based on the customer IP address, use an address defined by you, or make no assumption at all.

- No Location by Default
– Your store won’t make assumptions as to where your customers are visiting from and won’t calculate taxes until you specify your billing address. - Shop Base Address
– Taxes, languages, and currencies will be set according to the address you set here. This rule is only overridden by the billing address set by a customer at checkout. - Geolocation
- This feature enables WooCommerce to check where your customer is visiting from by looking at their IP address.
- The IP address is matched against a list of geographic locations stored in your website’s database.
- Enabling Geolocation updates the database with an extensive list of IP address ranges and the geographical areas they correspond to.
- Still, keep in mind that Geolocation in WooCommerce has a somewhat questionable reputation for two main reasons:
it slows down your site because of the added database load.
it doesn’t always guess correctly. Let’s say someone visits from a Danish IP, but they are English and require an English interface and currency. In such cases, Geolocation is actually an inconvenience rather than a feature, which can easily lose you customers.
An answer on Webmasters’ Stack Exchange raises a valid concern in this regard. Page Caching is an advanced topic outside the scope of this guide. Enable this when you want to use geolocation alongside a caching plugin.
Enable Taxes toggles tax rate calculations for your product prices. This option is enabled by default. If you are not looking for deep integration between your business and your store, you can have this setting disabled and manually enter the final prices for products.
If you need to have taxes applied dynamically, based on the location of your customer, then leave these options enabled.
We will discuss tax mechanics in detail in the next chapter of this ecommerce guide.
Note: Disabling taxes hides the tax settings page.

Enable Coupons activates the shopping coupon functionality. Coupons are a great addition to any product promotion or marketing campaign you’re running and are enabled by default.

Calculate Coupon Discounts Sequentially allows customers to combine coupons. For example, your customer has two coupons: each is for 10% off the product price. The first coupon will apply to the shelf price of the product and the second one – to the discounted price. This way, you can allow clients to pile up greater discounts.
Currency Options are self-explanatory. Use the fields and menus in this section to properly configure the display of your store’s native currency. You can add additional currencies through plugins.

Remember always to save the tweaks you make on a certain settings page with the blue Save Changes button located at the bottom.

