WordPress is a Content Management System (or CMS), so one of its main purposes is to give you control over your posts and pages. Categories are a significant part of all this, and, as we’ll find out in a minute, they can be beneficial to your project in more ways than one.
Let’s see how to make the most of them.
What Is a WordPress Category?
A WordPress category does exactly what you’d expect it to do – it helps you organize your posts in groups according to what they are about. Say, for example, you have a blog where you post about things from both your professional and personal life.
Your audience will find it much easier to navigate the content if the two are kept separate, so you want to put your work-related posts under one category and your personal stories in another. Every category has its own URL, so visitors can quickly get to the content they’re interested in.
There are further options for organizing your posts. To continue with our example, we’ll say that your professional activities range from testing different software solutions to reporting news about the latest hardware innovations.
With WordPress, you can have child categories, so your posts about a new generation of CPUs will be in a different place from your review of a new office suite. That way, visitors after a specific type of content will know where to look.
Now that we’ve seen how categories work, it’s time to learn how to manage them.
Creating and Managing WordPress Categories
Out of the box, WordPress comes with one category labeled Uncategorized, which also acts as the default category (all the posts you publish without specifying the category go to the default one).
You probably want to change the default category from Uncategorized to something else, and you’ll likely want to remove the Uncategorized category altogether. However, before you can do that, you need to create another category.
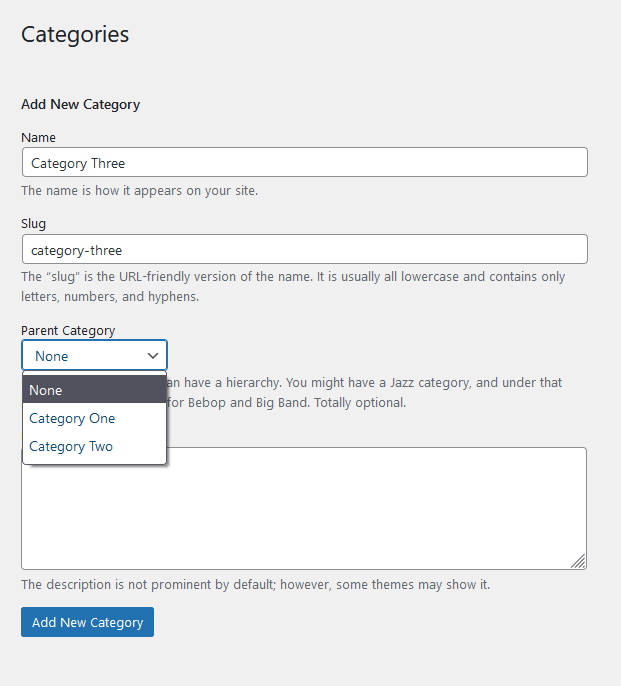
Log in to the WordPress dashboard and go to Posts > Categories. On the left, there’s a form you’ll need to fill in order to create a new category.
Here’s what you see:
- Name – This is the name of the category. It needs to reflect the content that will be hosted under it.
- Slug – The category’s slug is the text identifier found at the end of its URL. If you leave this field blank, WordPress will replace the spaces with hyphens and create an all-lowercase slug from the category name (e.g., the slug for “Category One” will be “category-one”).
- Parent Category – You can leave this blank for now.
- Description – You can use this field to describe the type of content users may expect from the posts in the new category. Bear in mind that only some themes will actually show the description.
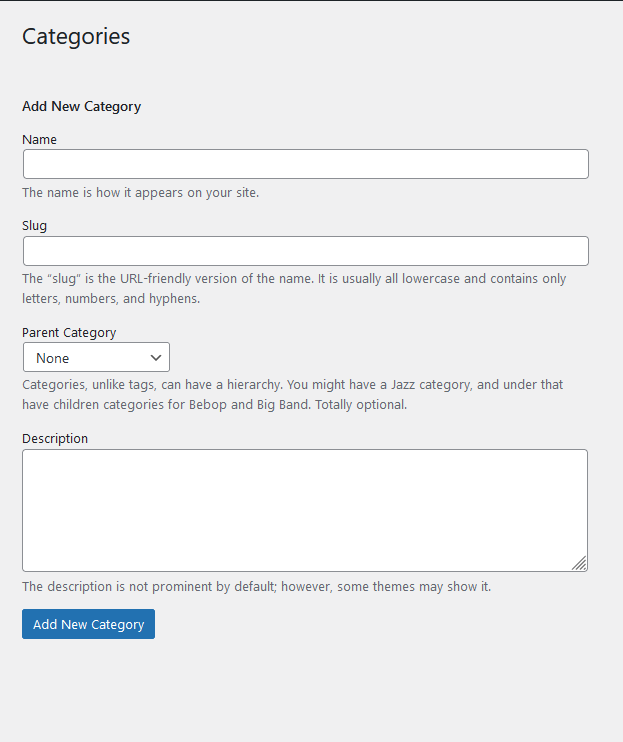
When you’re ready, click the Add New Category button. The category will immediately appear on the list you see in the right-hand section of the screen.
Now you have created another category, you can make it the default one.
Go to Settings > Writing and use the drop-down menu at the top of the page to choose the default category.
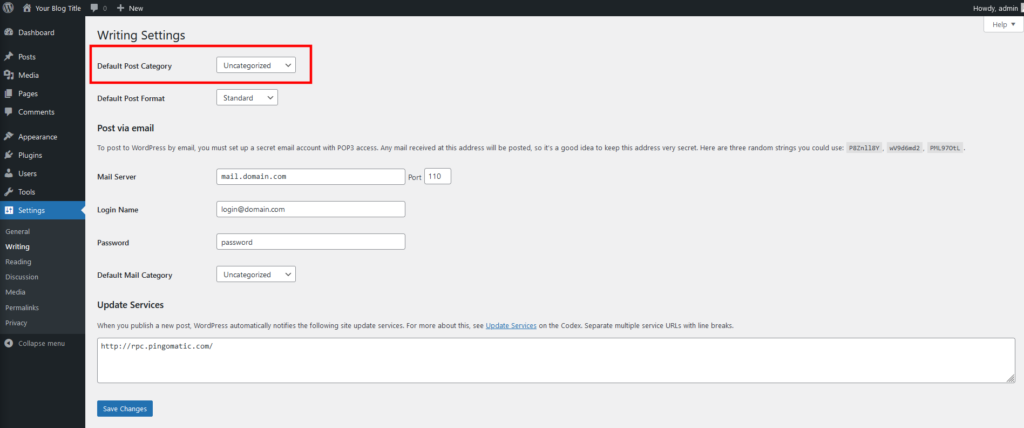
Don’t forget to click the Save Changes button before you continue.
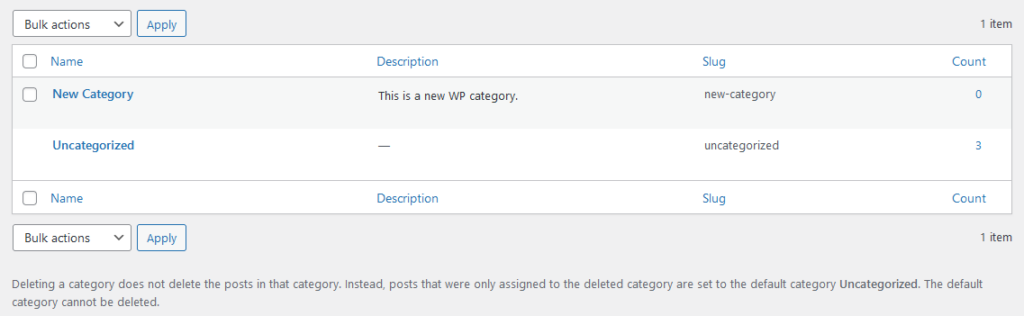
Because Uncategorized is no longer our default category, we can now delete it. Bear in mind that this won’t delete the posts under it. Instead, they will be moved under the new default category. Let’s see how it works.
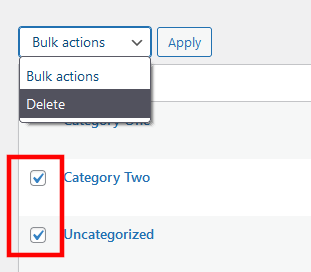
As you can see from the screenshot below, we currently have three categories: Category One, Category Two, and Uncategorized.
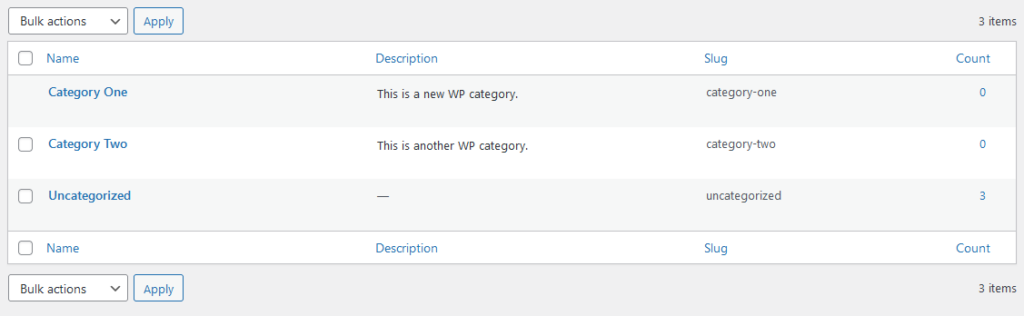
There are no posts in Category One and Category Two, and we have three posts in Uncategorized. We’ve already set Category One as the default category, so we can now delete Uncategorized. To do that, hover the mouse cursor over the category, and you’ll see the Delete link appear. Click on it and confirm that you want to delete the category.

If you want to delete multiple categories at once, you can use the checkboxes to the left of each category and select Delete from the Bulk actions menu.
The only category you can’t delete is the default one.
Creating a Child Category
Creating a child category is just as easy as setting up a regular one. The only difference is, you need to pick the parent category from the respective drop-down menu. Everything else is the same.
Assigning Posts to Categories
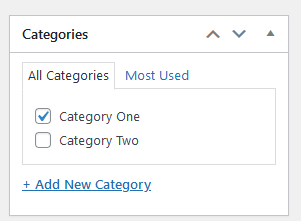
You can choose a category for your post while you’re editing it. The Categories menu is available in the sidebar on the right inside the block editor.
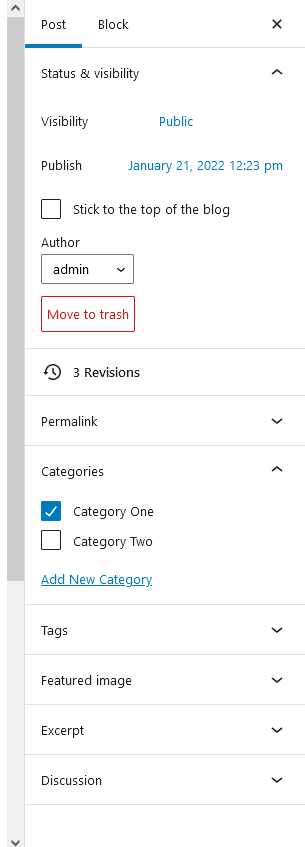
Notice that you can assign a single post to multiple categories. Through the same menu, you can also add new categories. Although the interface is slightly different, the functionality is pretty much the same in the Classic Editor.
Don’t forget to update the post to save the changes.
Editing WordPress Categories
You can edit a WordPress category as much as you want. Simply go to Posts > Categories, hover the mouse cursor over the category you’d like to modify, and click Edit.

You can modify the category’s name, slug, and description, and if it’s a child category, you can turn it into a regular one or change its parent. Bear in mind that changing the slug may affect your site’s SEO performance if the URLs have already been indexed by search engines.
Displaying Categories
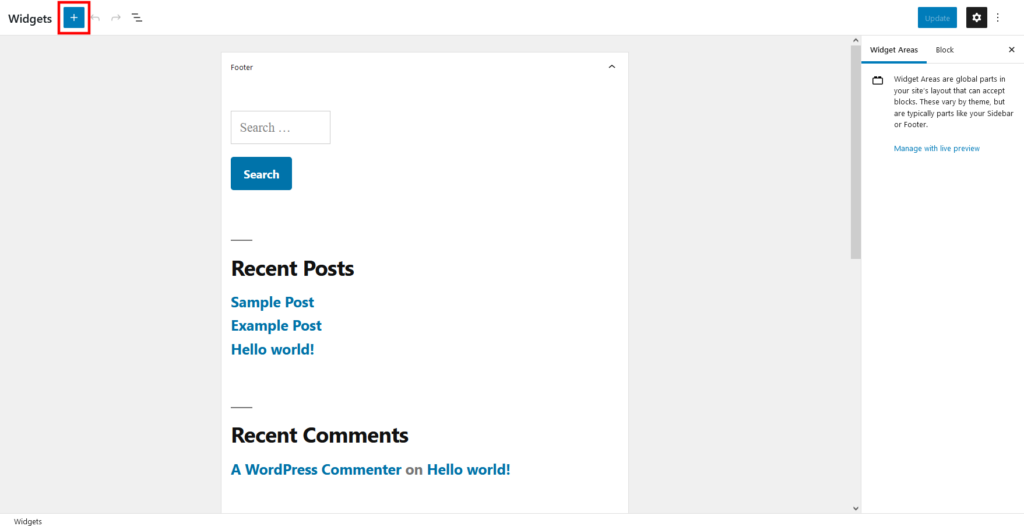
How your categories appear on your homepage depends on your theme. You’ll need a widget to display them on the homepage. Go to Appearance > Widgets inside your WP dashboard, and click the + button in the top left corner.
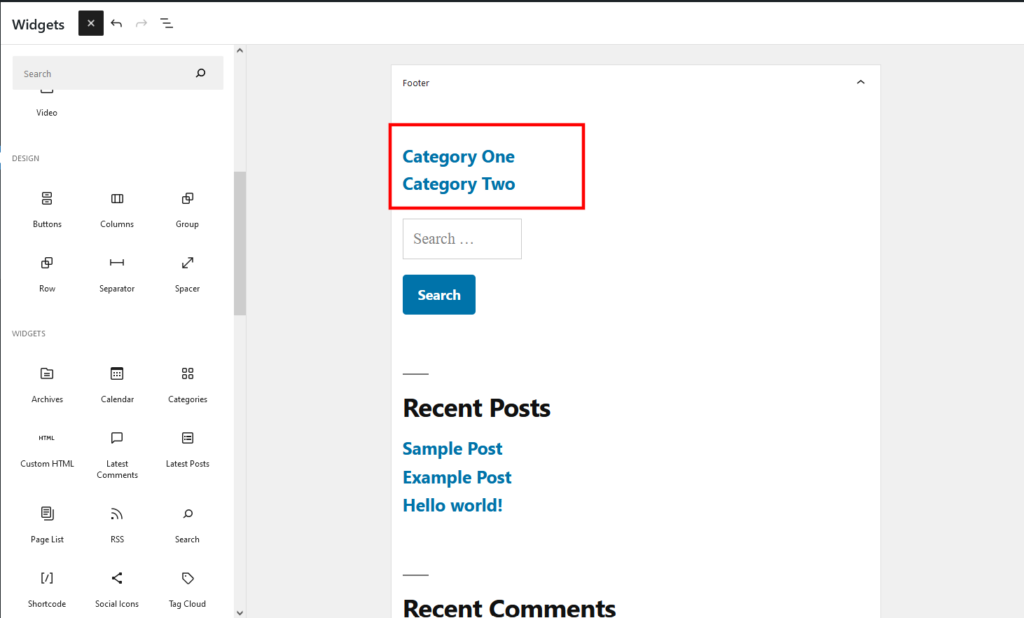
Find the Categories icon in the menu that appears and drag it to the widget’s planned location.

The list of categories will appear on the page automatically. Bear in mind that if there’s a category without any posts under it, it will remain hidden.
What Is the Difference Between a Category and a Tag?
WordPress tags represent another mechanism for grouping posts and pages according to their contents. If you want to create a well-structured site where people can easily find what they’re looking for, you need to understand how tags work and how they’re different from categories.
In basic terms, tags describe the contents of your posts in more detail. While categories give you an idea of what the publication is about, tags go into more specifics about what users can expect.
Let’s continue with our example from a few paragraphs up. You have your blog divided into two main categories – Professional posts and Personal stories. Under the Professional posts category, you have a few child categories – let’s say Software, Hardware, and Peripheral.
You are reviewing a keyboard by Dell, and you naturally put it under the Peripheral category. Similarly, when you’re testing the new Dell laptop, you save it under Hardware.
You can attach the tags “dell” and “review” to both posts. As a result, users looking for reviews instead of news, for example, can easily get to the most relevant posts. The same goes for visitors trying to learn more about Dell’s products.
Like categories, tags also get their own URL, so every post tagged as a review can be accessed through a single link. On the one hand, this improves your content’s structure, and on the other, it helps with your site’s search engine rankings by tying your posts to specific terms and keywords.
Adding tags to posts is just as easy as assigning them into categories. The menu is available from the toolbar on the right inside the block editor. Add all your tags separating them with commas, and press Enter to assign them to the post.
You can assign as many tags as you want, but make sure you don’t overdo it. If you use a tag only once, the tag page will be the same as the post, which may be interpreted by search engines as duplicate content.
Try to create tags that will genuinely help visitors find what they’re looking for.
Converting Categories to Tags
Sometimes, you may need to slightly alter your site’s content structure. As always, WordPress is flexible enough to provide you with plenty of options. Here, for example, is how to convert a category to a tag.
Log into your WordPress dashboard and go to Tools > Import. Locate the Categories and Tags Converter tool and click Install Now. WordPress will automatically install a plugin that enables the functionality.
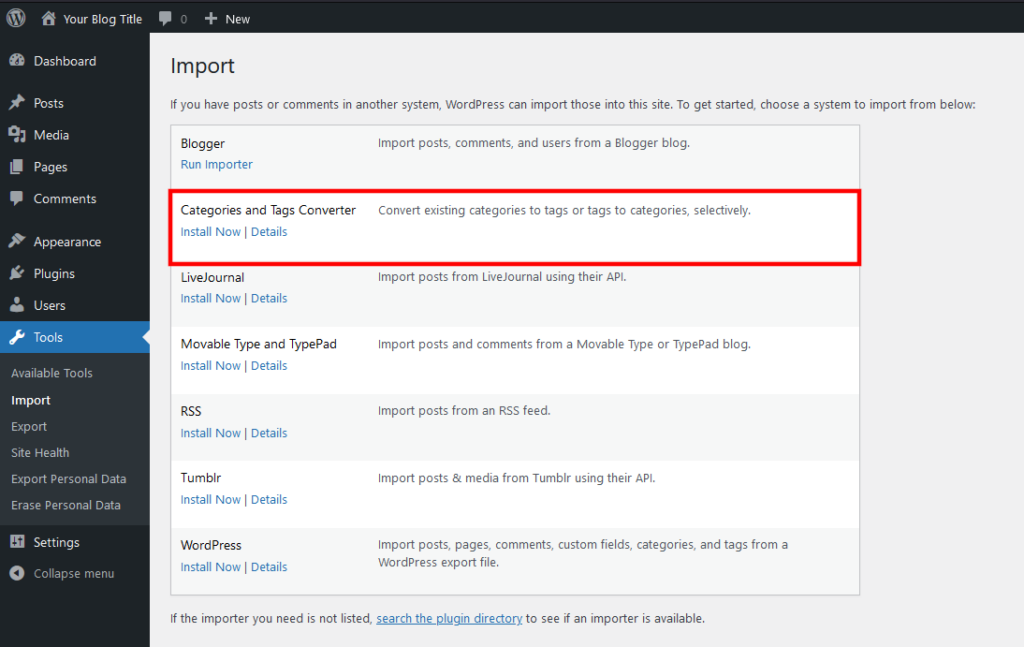
Unlike other add-ons, the Categories and Tags Converter plugin is activated by default. After it’s installed successfully, you’ll see a Run Importer option on the Tools > Import page.

The importer displays all your categories with checkboxes next to them. Select the relevant checkboxes and click Convert Categories to Tags. You can also convert tags to categories with the same tool.
WordPress Categories Best Practices
From a user experience perspective, it’s pretty clear what WordPress categories should do. They should simplify the way people browse your website and help them find the information they’re looking for.
However, they can be crucial for your site’s SEO performance, and many people might be wondering how to make sure they reap the full benefits.
The differences between projects are enormous, and it’s impossible to apply the same content structure to all of them. However, there are a few things you should and shouldn’t do when organizing your site’s posts and pages.
Try to build a strategy beforehand and think carefully about what you’ll write. Include as many categories as you need, and before publishing a post, think carefully about what category it should go in. Ideally, you won’t be moving posts between categories, as this can confuse both readers and search engine bots.
WordPress allows you to assign a post to more than one category, and sometimes, this may seem like a good idea. From an SEO perspective, however, it’s not. Putting the same post under two or more categories means that it will appear on multiple pages on your website, and search engine crawlers may treat this as duplicate content.
Speaking of search engines, through the Settings > Permalinks menu, you can configure WordPress to display the category in every single post URL. This may sound like a good idea at first. Search engines try to get as much information as possible from the URL itself.
However, if you ever need to change a post’s category, you’ll need to set up permanent redirects. In addition to this, it’s general knowledge that the shorter the URL, the better. That’s why experts advise against including the category in the WordPress permalinks.
