MySQL is everywhere. The relational database management system powers most web applications and is integral to almost all modern websites.
Most likely, your project uses it as well, and you may have not one but multiple MySQL databases on your hosting account.
But what do you need to do if you want to get rid of one of them?
Let’s look at the different options.
Deleting a MySQL Database Through the Command-Line Interface
The traditional way to delete MySQL databases is via the command line.
Those of you with less experience may be a bit intimidated by the prospect of using commands, but the truth is, if you approach the task meticulously, you’ll see that there’s little to go wrong.
Deleting a MySQL database involves several steps, which we’ll now go into.
1. Log in to your hosting account via SSH.
There are several options for establishing an SSH connection.
You can use your operating system’s command-line tool. If you use Windows, you can choose between Command Prompt or PowerShell, and if you’re on a Unix-based OS, you have the default Terminal as well as a number of third-party applications with the same functionality.
The command for starting an SSH session looks like this:
ssh [your account’s username]@[your server’s IP]
If the server uses a custom SSH port (the default one is port 22), you need to add -p followed by the port number.
After successful authentication, the server will start the session.
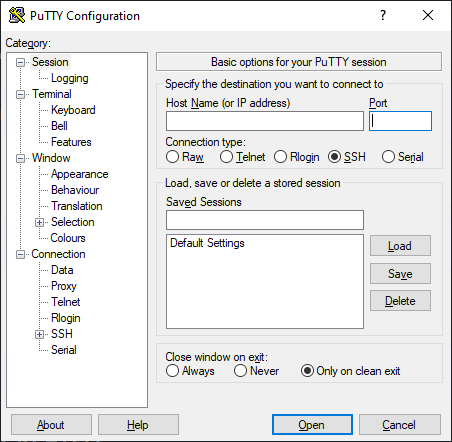
A second option would be an SSH client application like PuTTY. Although native SSH support is now available on all operating systems, some people continue to prefer dedicated clients because of the additional features and the ability to easily access saved sessions.
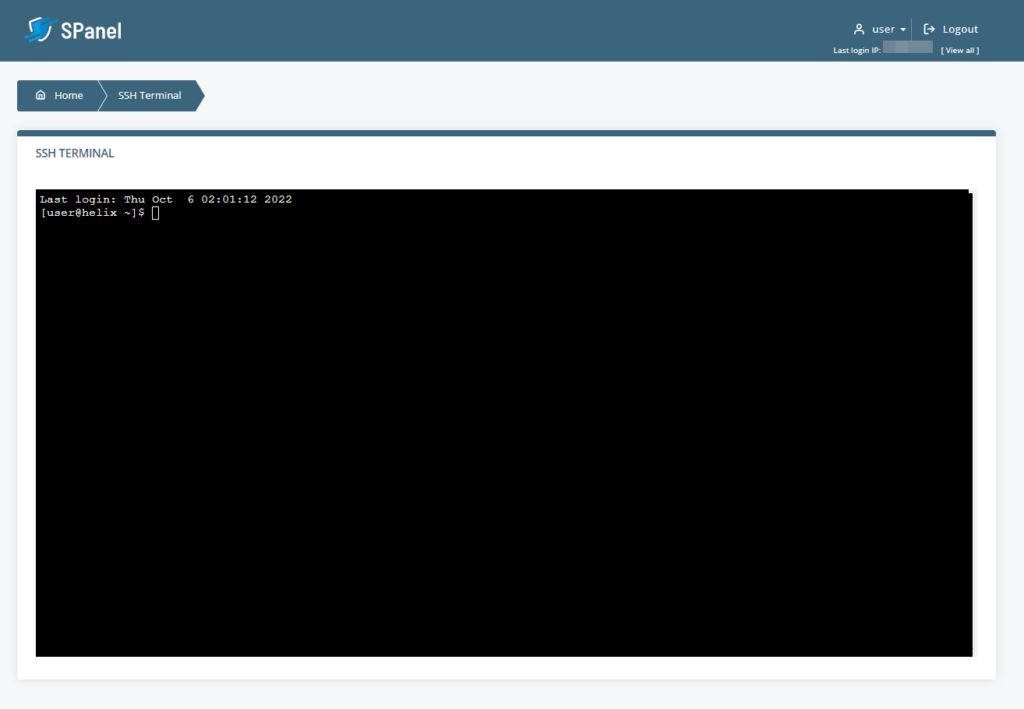
If you use SPanel, you have a third option. You can log in to the User Interface and open the SSH Terminal. SPanel will automatically redirect you to the command-line interface and open a shell.
2. Log in to the MySQL server.
You need to use a user account with sufficient privileges to delete a database. If you have an account with SYSTEM_USER privileges (like the root account, for example), you can delete any database you want. Other accounts may have access to specific databases only.
Whatever the case, you’ll need the following command to log in to the MySQL server:
mysql -u [the MySQL user’s username] -p
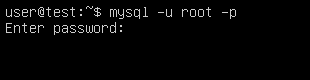
After providing the user account’s password, you’ll see the mysql> prompt.
3. Identify the database you want to delete.
From now on, we’ll use SQL commands. Generally speaking, the syntax, especially for simple tasks like deleting a database, isn’t that complicated. However, there are a few things that may catch newbies out.
First, it’s accepted that SQL statements must be written in uppercase letters for readability purposes. Mind you, this is more of a guidance than a rule. The commands will work even if you don’t stick to it.
What you do need to remember, however, is that all SQL commands end with a semicolon. Without it, MySQL interprets the Enter key as a new line.
Deleting a database via the command line is irreversible, so before you go on, you want to make sure you erase the correct one. That’s why it might not be a bad idea to go through the list of existing databases on the account and ensure you get the name right.
To see all databases, use the following command:
SHOW DATABASES;
MySQL will display a list of your user account’s databases.
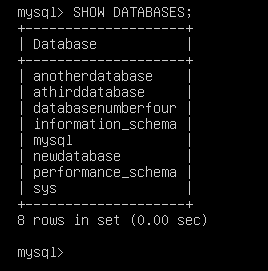
Locate the database you want to delete and make sure you memorize its name.
4. Delete the database.
A single command deletes the database. It looks like this:
DROP DATABASE [the name of the database];
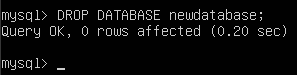
There’s no “Are you sure?” prompt, and unless you have a backup, you won’t be able to restore the database after you hit enter, so make sure you double-check everything.
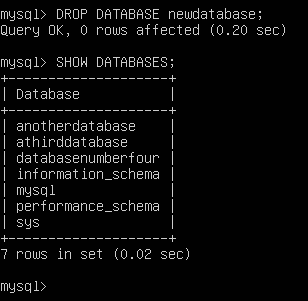
5. Confirm that the database has been successfully removed.
MySQL’s output isn’t especially helpful. In fact, usually, all you get is a Query OK message.
That’s why many people prefer to confirm that the database has been successfully deleted with the SHOW DATABASES; command.
Deleting a Database With the mysqladmin Binary
There’s another method for deleting a MySQL database via the command-line interface. The mysqladmin binary is a valuable tool that simplifies a number of database administration tasks, including setting and changing the root password, checking status variables, threads, client processes, etc.
It’s accessible only via the command-line interface, so before you can use it, you need to log in to your hosting account via SSH.
You can delete a database with it, as well. All you need is the name of the database and the login credentials of a MySQL user account with access to it.
The command looks like this:
$ mysqladmin -u [the user account’s username] -p drop [the database’s name]
Note that this is not an SQL command. You can execute it without logging in to the MySQL server, so you don’t need a semicolon at its end.
This time, you get a warning that dropping the database will irreversibly erase all the data inside it, and you need to confirm that you’re sure you want to proceed. In the end, mysqladmin will inform you that the database is deleted.

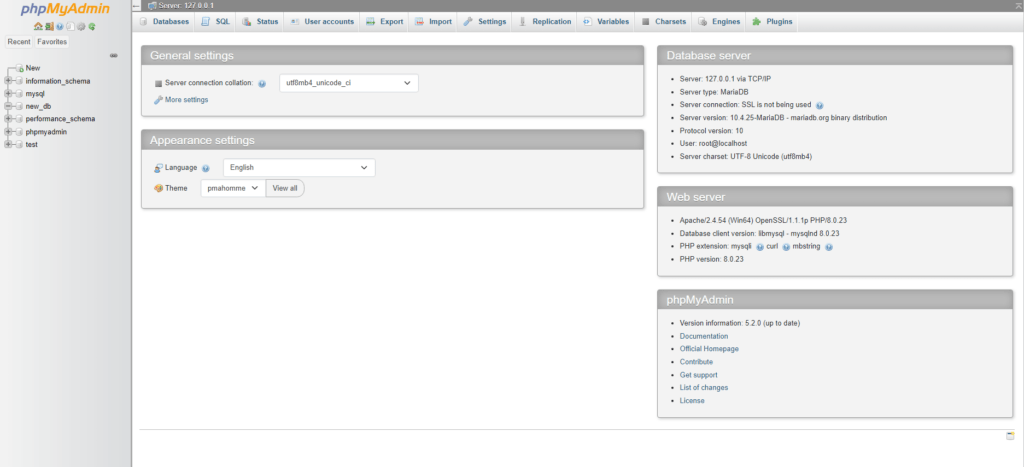
Deleting a Database in phpMyAdmin
The phpMyAdmin database administration platform is a part of many shared and managed hosting accounts nowadays. It has all the tools you need to manage your MySQL databases, and it’s integrated into quite a few popular web hosting control panels, including cPanel and SPanel.
It also has an intuitive graphical interface, so you don’t need to memorize any commands.
Deleting a database is a matter of a few mouse clicks.
1. Log into phpMyAdmin with a MySQL user account that can delete databases.
The default phpMyAdmin login URL is https://[your server’s IP]/phpmyadmin/, though some hosting providers change it for security reasons.
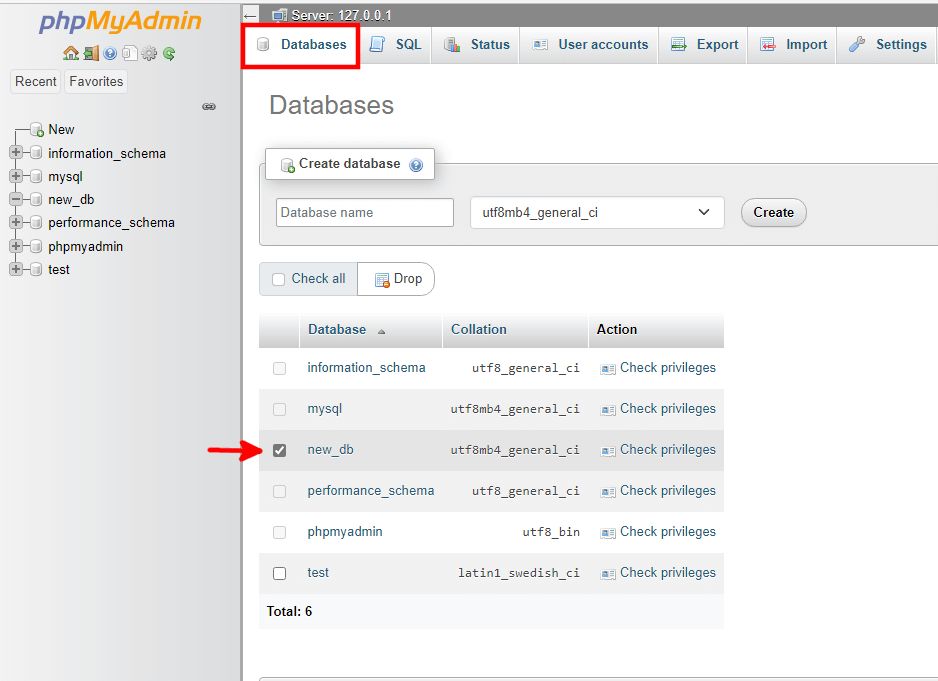
2. Go to the Databases tab and select the database you want to delete.
Under the Databases tab, you’ll find your user account’s databases as well as a couple of default schemas (information_schema and performance_schema). Find the database you want to erase and select the checkbox next to it.
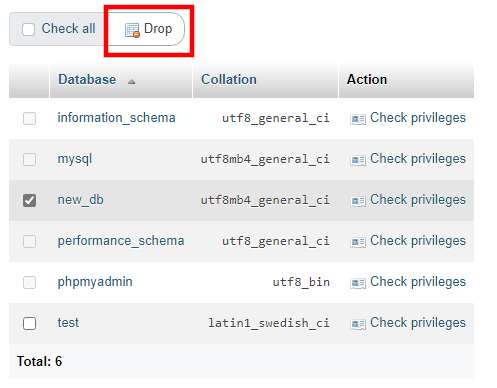
3. Click Drop and confirm that you want to delete the database.
The Drop button is situated just above the list. After you click it, phpMyAdmin will warn you that you are about to delete the entire database. All you need to do is confirm that you want to proceed.
Deleting a Database With MySQL Workbench
MySQL Workbench is another database administration platform that helps you manage your databases without typing commands or queries. Unlike phpMyAdmin, it’s not installed on your hosting server. Instead, you set it up on your Windows, Linux, or Mac computer and use it to connect to a remote server or develop your databases locally.
Let’s see how you can remove databases from your hosting account.
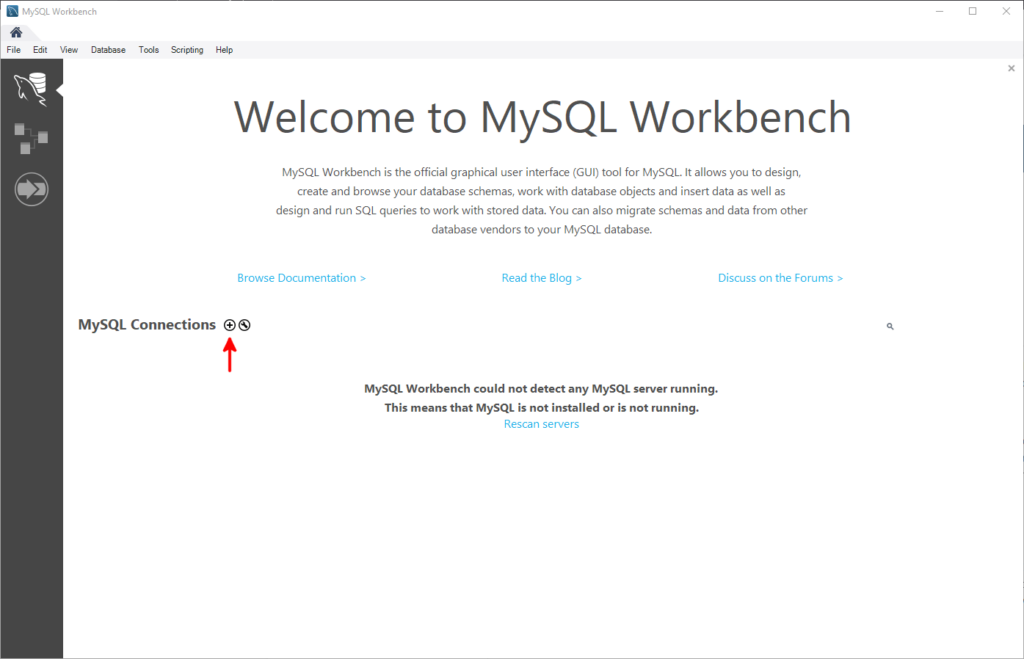
1. Connect to your web hosting server.
Your first job is to establish a connection to your web hosting account. On the home screen, you’ll see a + button in the MySQL Connections section.
Workbench has a range of different mechanisms for connecting to the remote server. The one you should go for is Standard TCP/IP over SSH. With it, the communication between the server and your computer will be encrypted and, therefore, more secure.
You first need to provide the server’s IP address, SSH port, and your SSH login credentials. MySQL Workbench can also use SSH keys for faster connections and extra security.
Next, you need to configure Workbench to use your MySQL user account. To delete a database, you’ll need to use an account with the correct privileges.
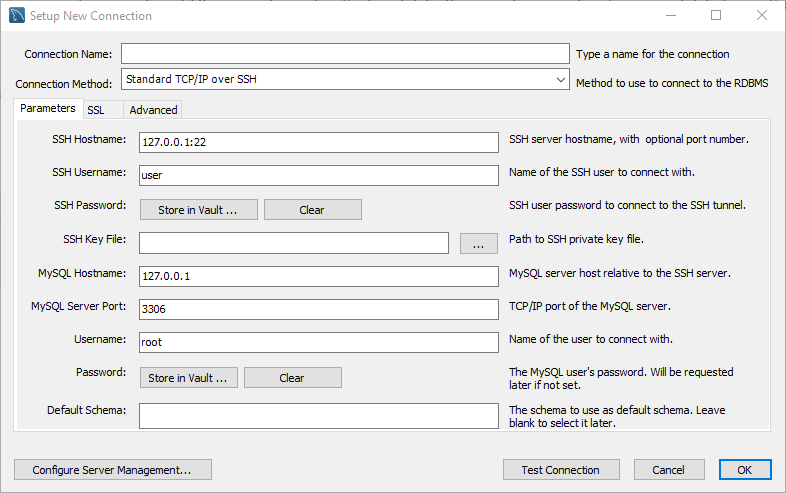
You can use the Test connection button to ensure you’ve provided the correct details. With the OK button, you save the connection, and it becomes accessible from Workbench’s home screen.
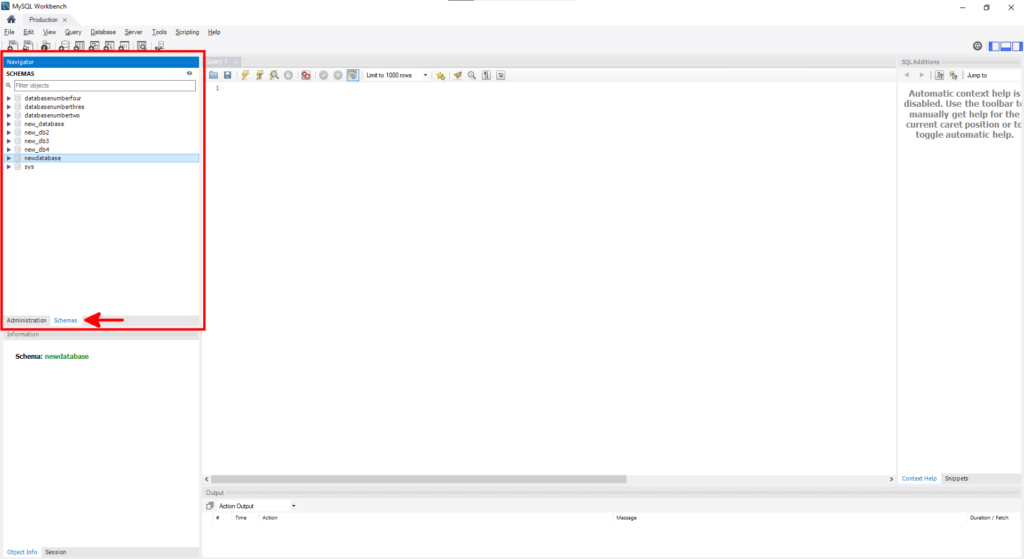
2. Find the database you want to delete.
After you connect to the server, You’ll see the main dashboard. In the Navigator section, you need to open the Schemas tab. It contains a list of all the databases currently situated on your account.
Find the database you want to delete and right-click on it.
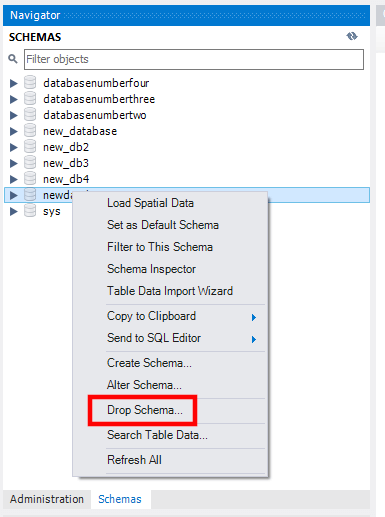
3. Click Drop schema and confirm that you want to erase the database.
Select Drop schema from the context menu and confirm that you want to delete the database.
Deleting a Database In SPanel
SPanel, ScalaHosting’s all-in-one server management platform, gives you a suite of tools that simplify the complicated task of developing an online project. This obviously includes the utilities for creating, managing, and removing databases.
In light of this, it should be no surprise that erasing a database in SPanel is nice and simple.
1. Log in to SPanel’s User Interface.
First, you need to access the SPanel account that hosts the database. There are a couple of ways to do it.
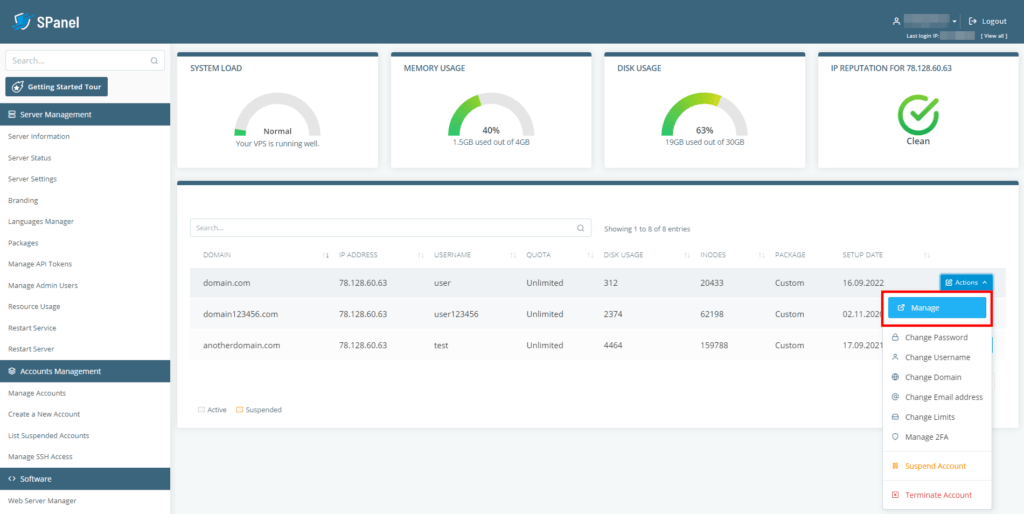
You can log in via the Admin Interface. On the homepage, you’ll see a list of all the accounts on the server. Find the one you need, open the Actions menu, and click Manage.
SPanel will redirect you straight to the account’s User Interface.
Alternatively, if you have the user account’s login credentials, you can sign in at https://[the account’s domain name]/spanel/.
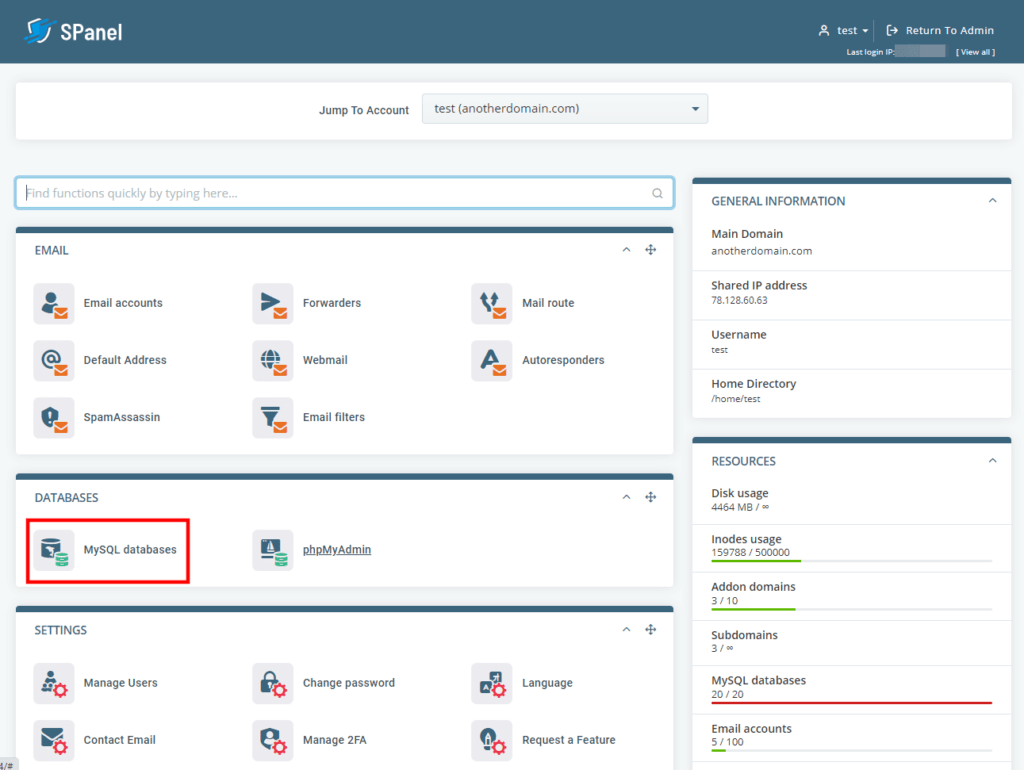
2. Go to MySQL databases and find the database you want to delete.
The MySQL databases section is accessible via the homepage of SPanel’s User Interface.
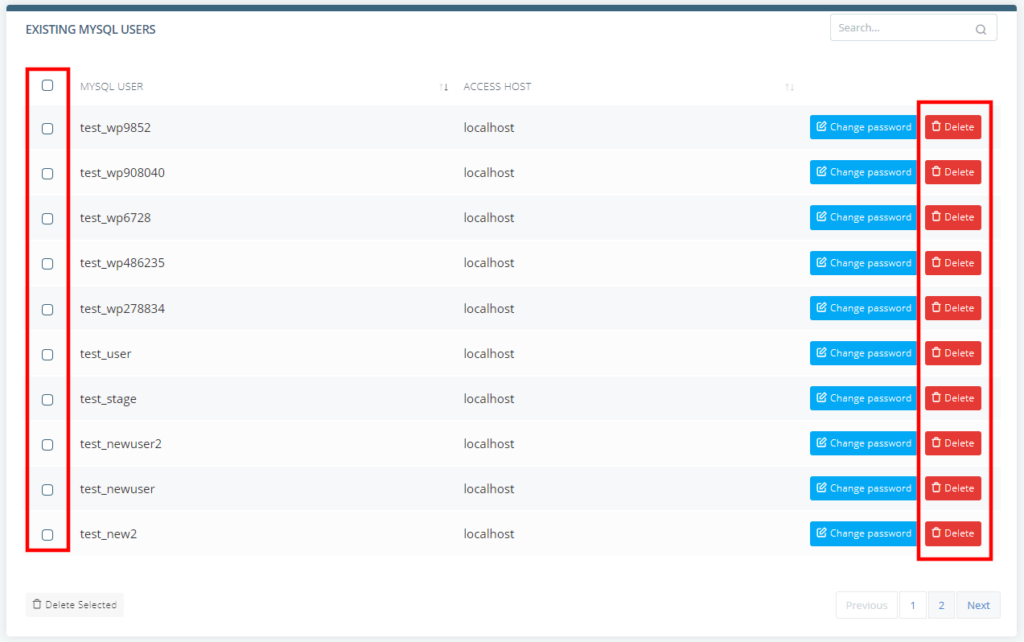
Once you open it, you’ll see a list of all existing databases below the database and user setup forms. SPanel displays 10 databases per page, so if you can’t find the one you’re looking for, you can go to the next page. There’s a handy search box, as well.
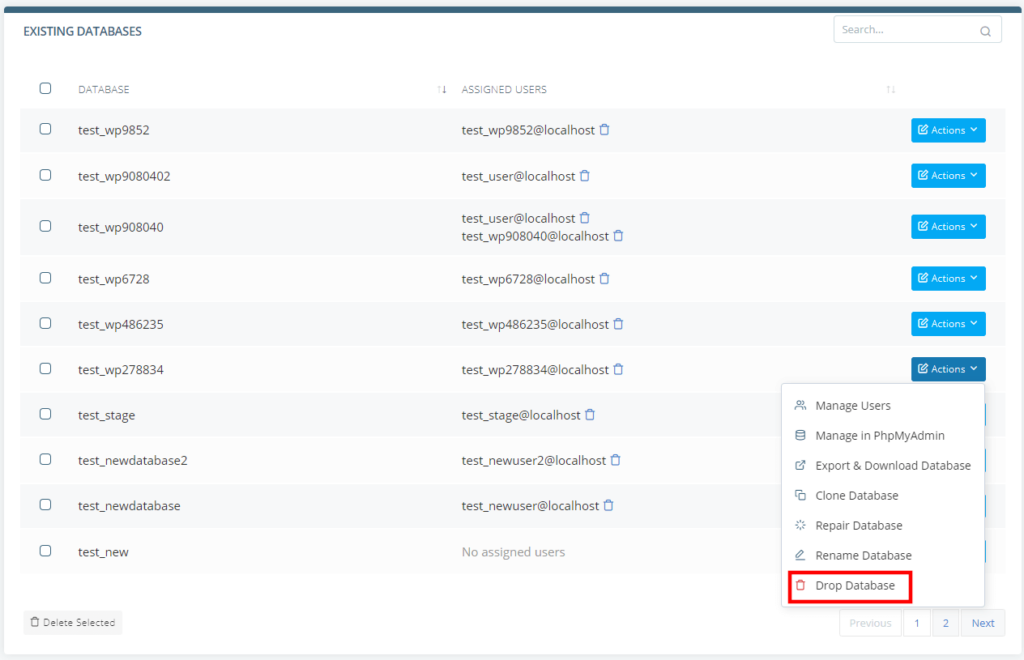
3. Delete the database.
If you wish to delete a single database, you can open the Actions drop-down menu next to it and select Drop Database.
You can also drop multiple databases at once by selecting the checkboxes next to them and clicking Delete Selected.
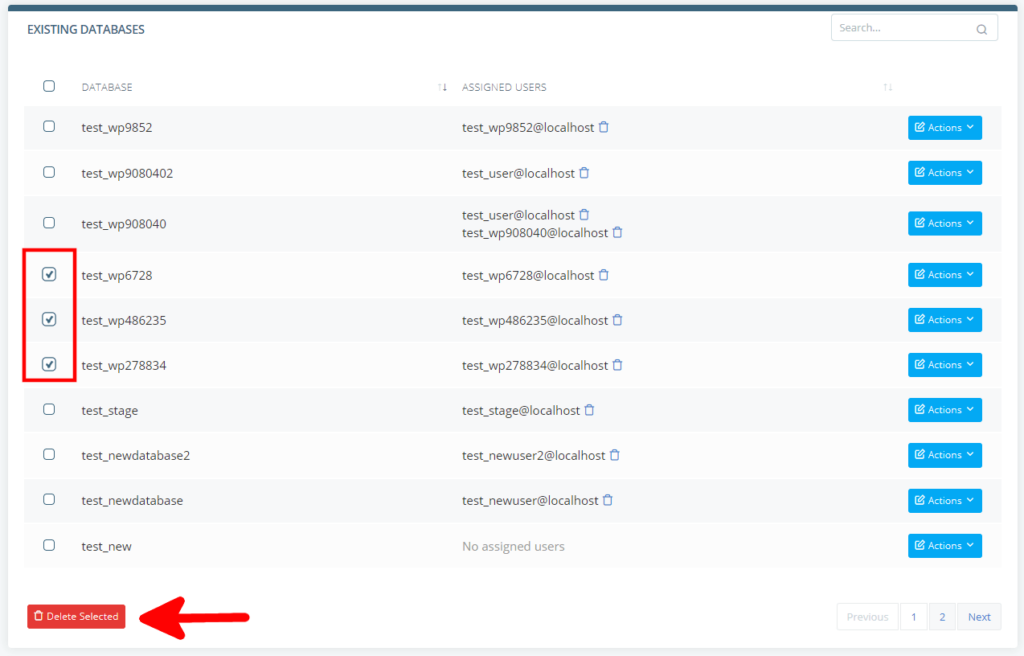
Before it proceeds, SPanel will ask you to confirm that you want to erase the database(s).
At the bottom of the page, you’ll see a list of existing MySQL user accounts, and you can easily remove the ones you don’t need. There’s a Delete button next to each of them, and like the databases, you can use the checkboxes to remove several accounts at once.