Most hosting solutions come with all the software you’ll need to set up and manage a website. For example, if you use a shared or managed VPS account, you’ll probably have access to a web hosting control panel.
Although there are plenty of alternatives on the market, cPanel seems to be by far the most popular web hosting control panel out there. With it, you get all the tools and utilities you need to manage your project wrapped up in an intuitive Graphic User Interface (GUI).
Things are a bit different if you use a self-managed VPS.
A self-managed virtual server can be used for hosting websites, but it can also play a number of other roles, including as a backup server, a node in a VPN, or a part of a web application’s infrastructure.
Because self-managed VPSs can be used in such a diverse range of scenarios, server owners often have no use for cPanel.
Those of you who are used to having a GUI-based suite of tools may think that without it, managing an entire server would be a massive challenge. Let’s see if this is the case.
What’s a cPanel?
A cPanel is a web-based control panel used for managing web hosting service accounts. It provides you with the tools you need to successfully create and manage your websites via your favorite web browser.
In other words, the cPanel gives you a graphical interface that allows you to control your server. If you don’t have cPanel’s tools, you’ll need to go through all the tasks using commands.
So, let’s get to it.
What Are the Advantages of Using a VPS Without cPanel?
Even though the cPanel makes your life easier, there are certain advantages to running a server without it. Let’s explore some of them.
Reduction of Attack Vectors
An attack vector is a pathway or method that allows a hacker to compromise your server’s security.
As a core management platform, cPanel has permissions to make serious changes to your server’s most critical settings. If it has unpatched security bugs and vulnerabilities, it can present a gateway for hackers to infiltrate your VPS.
Saving System Resources
cPanel runs on your server all the time, which means that it’s consuming hardware resources that would otherwise be available to your website. As a result, you can expect better performance from a correctly configured non-cPanel server.
Saving costs
cPanel is a proprietary product. To use it, you need to pay a monthly licensing fee, and if you need many user accounts, the bills could rack up quickly, especially after the recent pricing policy changes.
Using a custom Setup
cPanel is a pretty comprehensive platform, but if your project requires a custom hosting environment, you might need a product that is not supported by cPanel. In that case, you’ll be better off with a non-cPanel server.
Is It Difficult to Set Up VPS Without a cPanel?
How difficult it is to manage your server without cPanel depends mainly on what you’re trying to do. Whatever your project, you’ll need to use SSH to execute commands on the server and FTP (or SFTP) to manage your files and folders.
Let’s see how you can get started.
Manage your VPS without cPanel – Step by Step
If you intend to run VPS without cPanel, the following guide should come in handy.
VPS with Linux OS – Getting started
After your ScalaHosting virtual server is deployed, you will need to access it and manage it remotely. Since our self-managed VPS solutions are all Linux-based, you’ll need to use SSH.
Connect to your server via SSH
Sometimes called secure socket shell, SSH is a protocol that allows you to connect to a computer or server using a command-line interface remotely
All self-managed VPS plans allow SSH access, and you will get more information on how to log into it in the welcome email you’ll receive after the server is deployed.
You’ll need a command-line interface to connect to the server, so if you run Windows, you’ll need to open PowerShell or the command prompt. On Linux or MacOS, you can use the Terminal.
The command you need to use looks something like this:
ssh [your username]@[your server’s IP address]
The server will request your account’s password, and after you enter it, you will log in successfully.
Connect to your server via SFTP
Secure file transfer protocol (SFTP) is the regular File Transfer Protocol protected by SSH. If you’ve got access to a server with an account over SSH, you can use the same login credentials to access the server’s file system over SFTP.
Several FTP clients like Filezilla support SFTP. To use SFTP instead of FTP, simply specify sftp:// before the hostname or IP. You should also change the port to 22 (the default SSH port) instead of 21.
![]()
Install Apache/LiteSpeed/Nginx
To install Apache, use the sudo apt-get install apache2 command. Confirm it when the system gives you a confirmation message.
To verify that Apache got installed correctly, you can run the following command:
apache2 -v
If everything is fine, the server will return the version of Apache currently install on your server.
To install LiteSpeed, you first need to update the system packages with the following command:
$ sudo apt-get update
Next, you need to install OpenLiteSpeed dependencies with the command:
$ sudo apt-get install -y build-essential
$ sudo apt-get install -y rcs libpcre3-dev libexpat1-dev libssl-dev libgeoip-dev libudns-dev zlib1g-dev libxml2 libxml2-dev libpng-dev openssl
To install OpenLiteSpeed, you should go to the OpenLiteSpeed downloads page and download the latest stable edition as follows:
$ wget https://openlitespeed.org/packages/openlitespeed-1.4.34.tgz
Decompress the downloaded file:
$ tar -xzvf openlitespeed-1.4.34.tgz
Then change into the installation directory, compile, and install the package as the root user:
$ cd openlitespeed-1.4.34/
$ sudo ./configure
$ sudo make && sudo make install
OpenLiteSpeed will be automatically installed in >/usr/local/lsws directory
Use the following command to configure the administrative password for OpenLiteSpeed:
$ sudo /usr/local/lsws/admin/misc/admpass.sh
Ensure that you specify the administrator’s username, which is the username needed to log in to the Web interface.
Also ensure that you specify the administrator’s password, that’s the password you’ll need to log in to the administration Web interface.
Once you’ve authenticated the administrator’s username and password successfully, you can launch the OpenLiteSpeed web server:
$ sudo /etc/init.d/lsws start
For Nginx, you need to first update the package information with the following commands.
$ sudo apt-get update -y
Next, you should install the Nginx server.
For Ubuntu, enter the command:
$ sudo apt install nginx -y
Testing the installation success requires you to input your server’s public IP address on a web browser.
Install MySQL
Since dynamic websites need MySQL to store and manage data, you can install this database management system by running the following commands.
$ sudo apt install mysql-server
Unfortunately, a MySQL installation isn’t secure by default. Thus, you need to modify most of its settings to ensure its security. To do this, run the following command:
$ sudo mysql_secure_installation
When prompted, you can input the following as answers:
Enable valid password Plugin? Y
Password Validation Policy Level: 2
Root Password: Enter password here
Re-enter password: Repeat password here
Continue with the Password provided? Y
Remove anonymous users? Y
Disallow root login remotely? Y
Remove test database and access to it? Y
Reload privileges tables now? Y
When you’ve successfully filled all fields, you should receive a “Success! All done’’ note.
Install PHP
Although the web server and MySQL are already up and running, you still need to install the Hypertext Preprocessor (PHP) to retrieve data from the MySQL database. The following commands will come in handy when taking this step.
For Ubuntu, enter:
$ sudo apt-get install php-fpm php-mysql
Configure the Server to support PHP
For Nginx to support PHP requests, you’ll have to edit the ‘/etc/nginx/sites-available/default’ file with this:
$ sudo nano /etc/nginx/sites-available/default
The highlighted values are the ones you need to change:
server {
listen 80;
root /var/www/html;
server_name _;
index index.php index.html index.htm index.debian-default.html;
location / {
try_files $uri $uri/ /index.php$is_args$args;
}
location ~ \.php$ {
include snippets/fastcgi-php.conf;
fastcgi_pass unix:/run/php/php7.1-fpm.sock;
}
}
Next, reload Nginx with this:
$ sudo systemctl reload nginx
Testing
To confirm the status of PHP, you need to create a file using nano editor:
$ sudo nano /var/www/html/phpinfo.php
Once the editor opens, copy and paste the text below:
<?php
phpinfo();
?>
After copying the content, close the file by pressing keyboard shortcut CTRL + X, Y and then Enter.
Next, you’ll visit the URL http://your_ip_address/phpinfo.php
You should see a detailed PHP page if everything is how it’s supposed to be.
Why SPanel and Managed VPS are better for Beginners and Less Experienced Users?
cPanel isn’t the only control panel out there. In fact, you can find platforms that give you the same sort of usability without costing you as much. Take SPanel, for example.
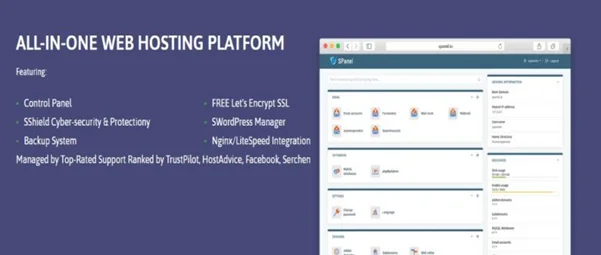
SPanel is an all-in-one hosting platform for cloud VPS management.
What makes SPanel a great alternative?
Affordability
Unlike cPanel, you don’t need to pay a monthly license fee to use SPanel. You can use the platform on ScalaHosting’s managed VPS servers for free.
Compatibility
SPanel is 100% compatible with cPanel, meaning migrating projects between the two platforms is seamless. You get support for fast web servers like Nginx and LiteSpeed, and you can integrate other tools and platforms via the API.
Better Data Security
SPanel has a backup system that you can configure to fit any client requirements. The tool saves several of your data’s restore points on remote backup servers. Locating them requires you to browse the recovery points and restore individual files, whole directories, and databases from the control panel.
You also SShield – a proprietary security system developed by ScalaHosting that uses artificial intelligence and stops 99.9% of all known cyberattacks.
Conclusion
cPanel is an extremely convenient management platform that can be an indispensable part of your preparation to launch and maintain a new website. However, on some rare occasions, you’re better off running your VPS without it.
This may involve some getting used to, especially for people with less experience. Ultimately, however, as long as you don’t need to do anything particularly complex, you should have no problems wrapping yourself around it.
